Start on the dashboard
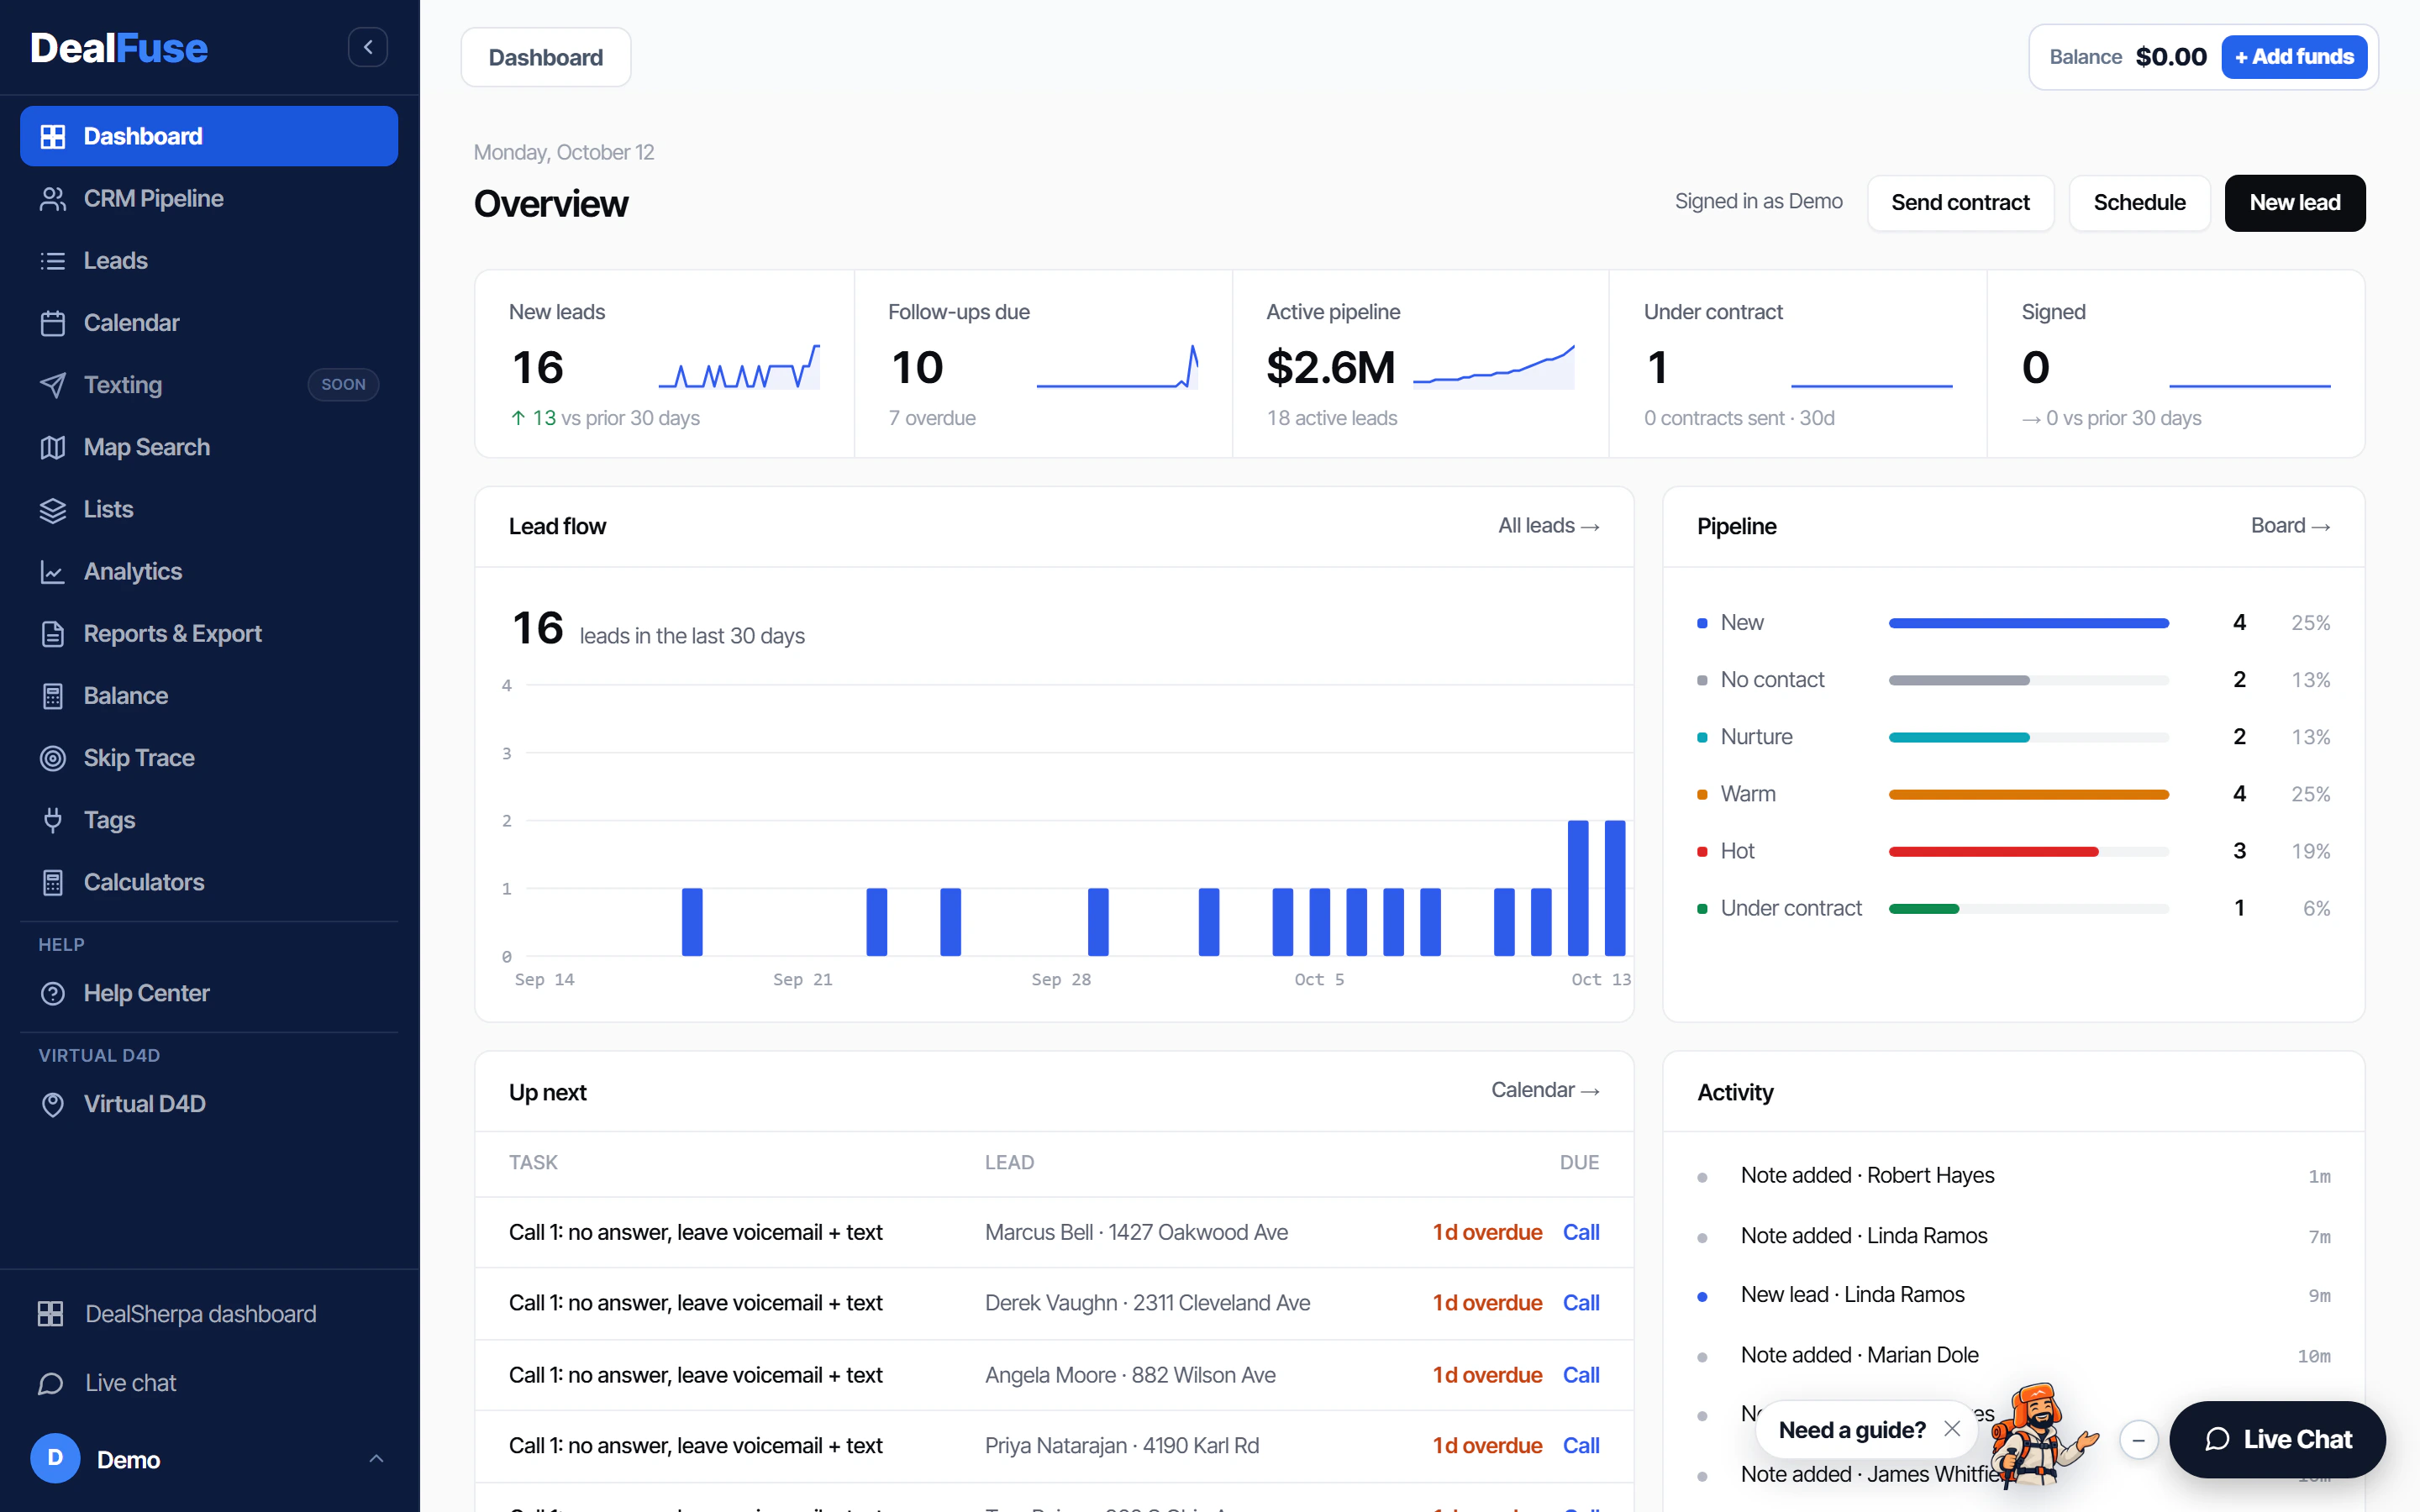
The dashboard shows how your pipeline looks today: how many new leads came in, how many follow-ups are due, what's under contract and what's signed. You can send a deal to DealSign for signature, put an appointment on your calendar, or add a new lead from here.
- 1
Send contract opens a DealSign contract, Schedule opens a new calendar appointment, and New lead adds a seller without leaving the page.
How the pipeline boards work
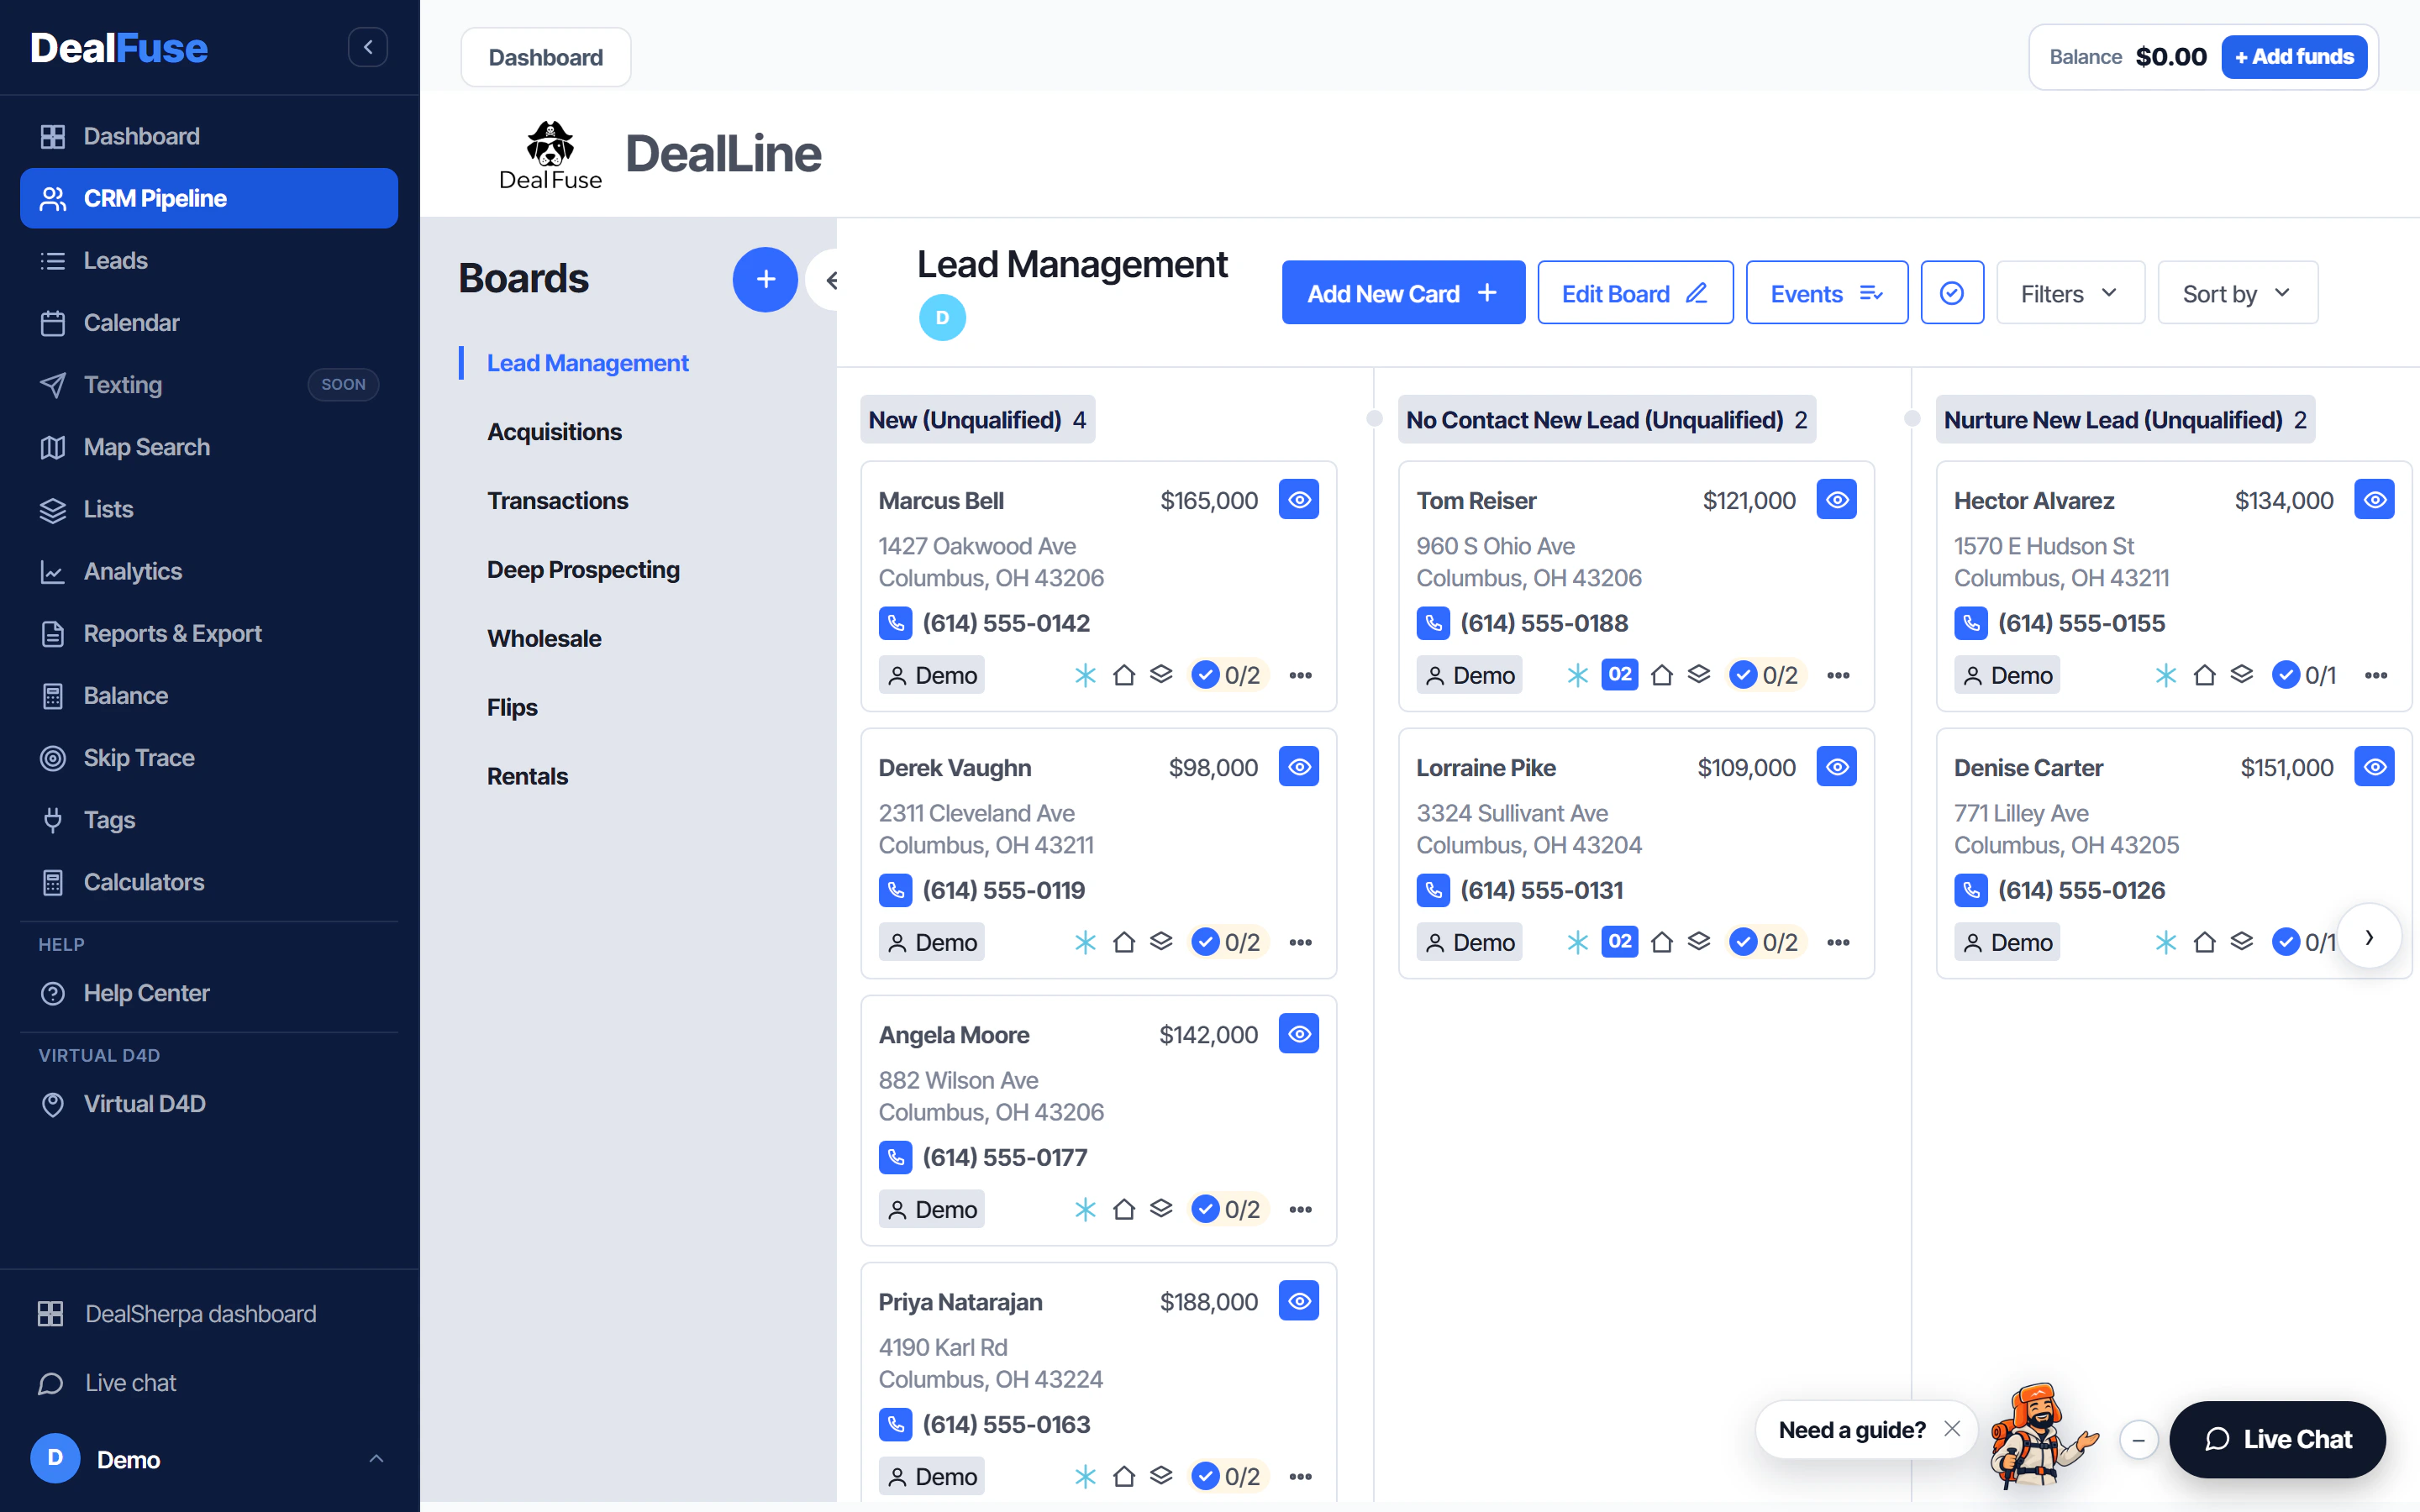
Every column is a category. A lead you're working sits in Lead Management (New, Nurture, Cold, Warm, Hot). Once you've set an appointment, move it to the Acquisitions board; once it's under contract, move it to Transactions.
You can shape your boards how you like or keep our template.
- 1
The boards are on the left; the columns of the board you're on fill the rest of the screen.
- 2
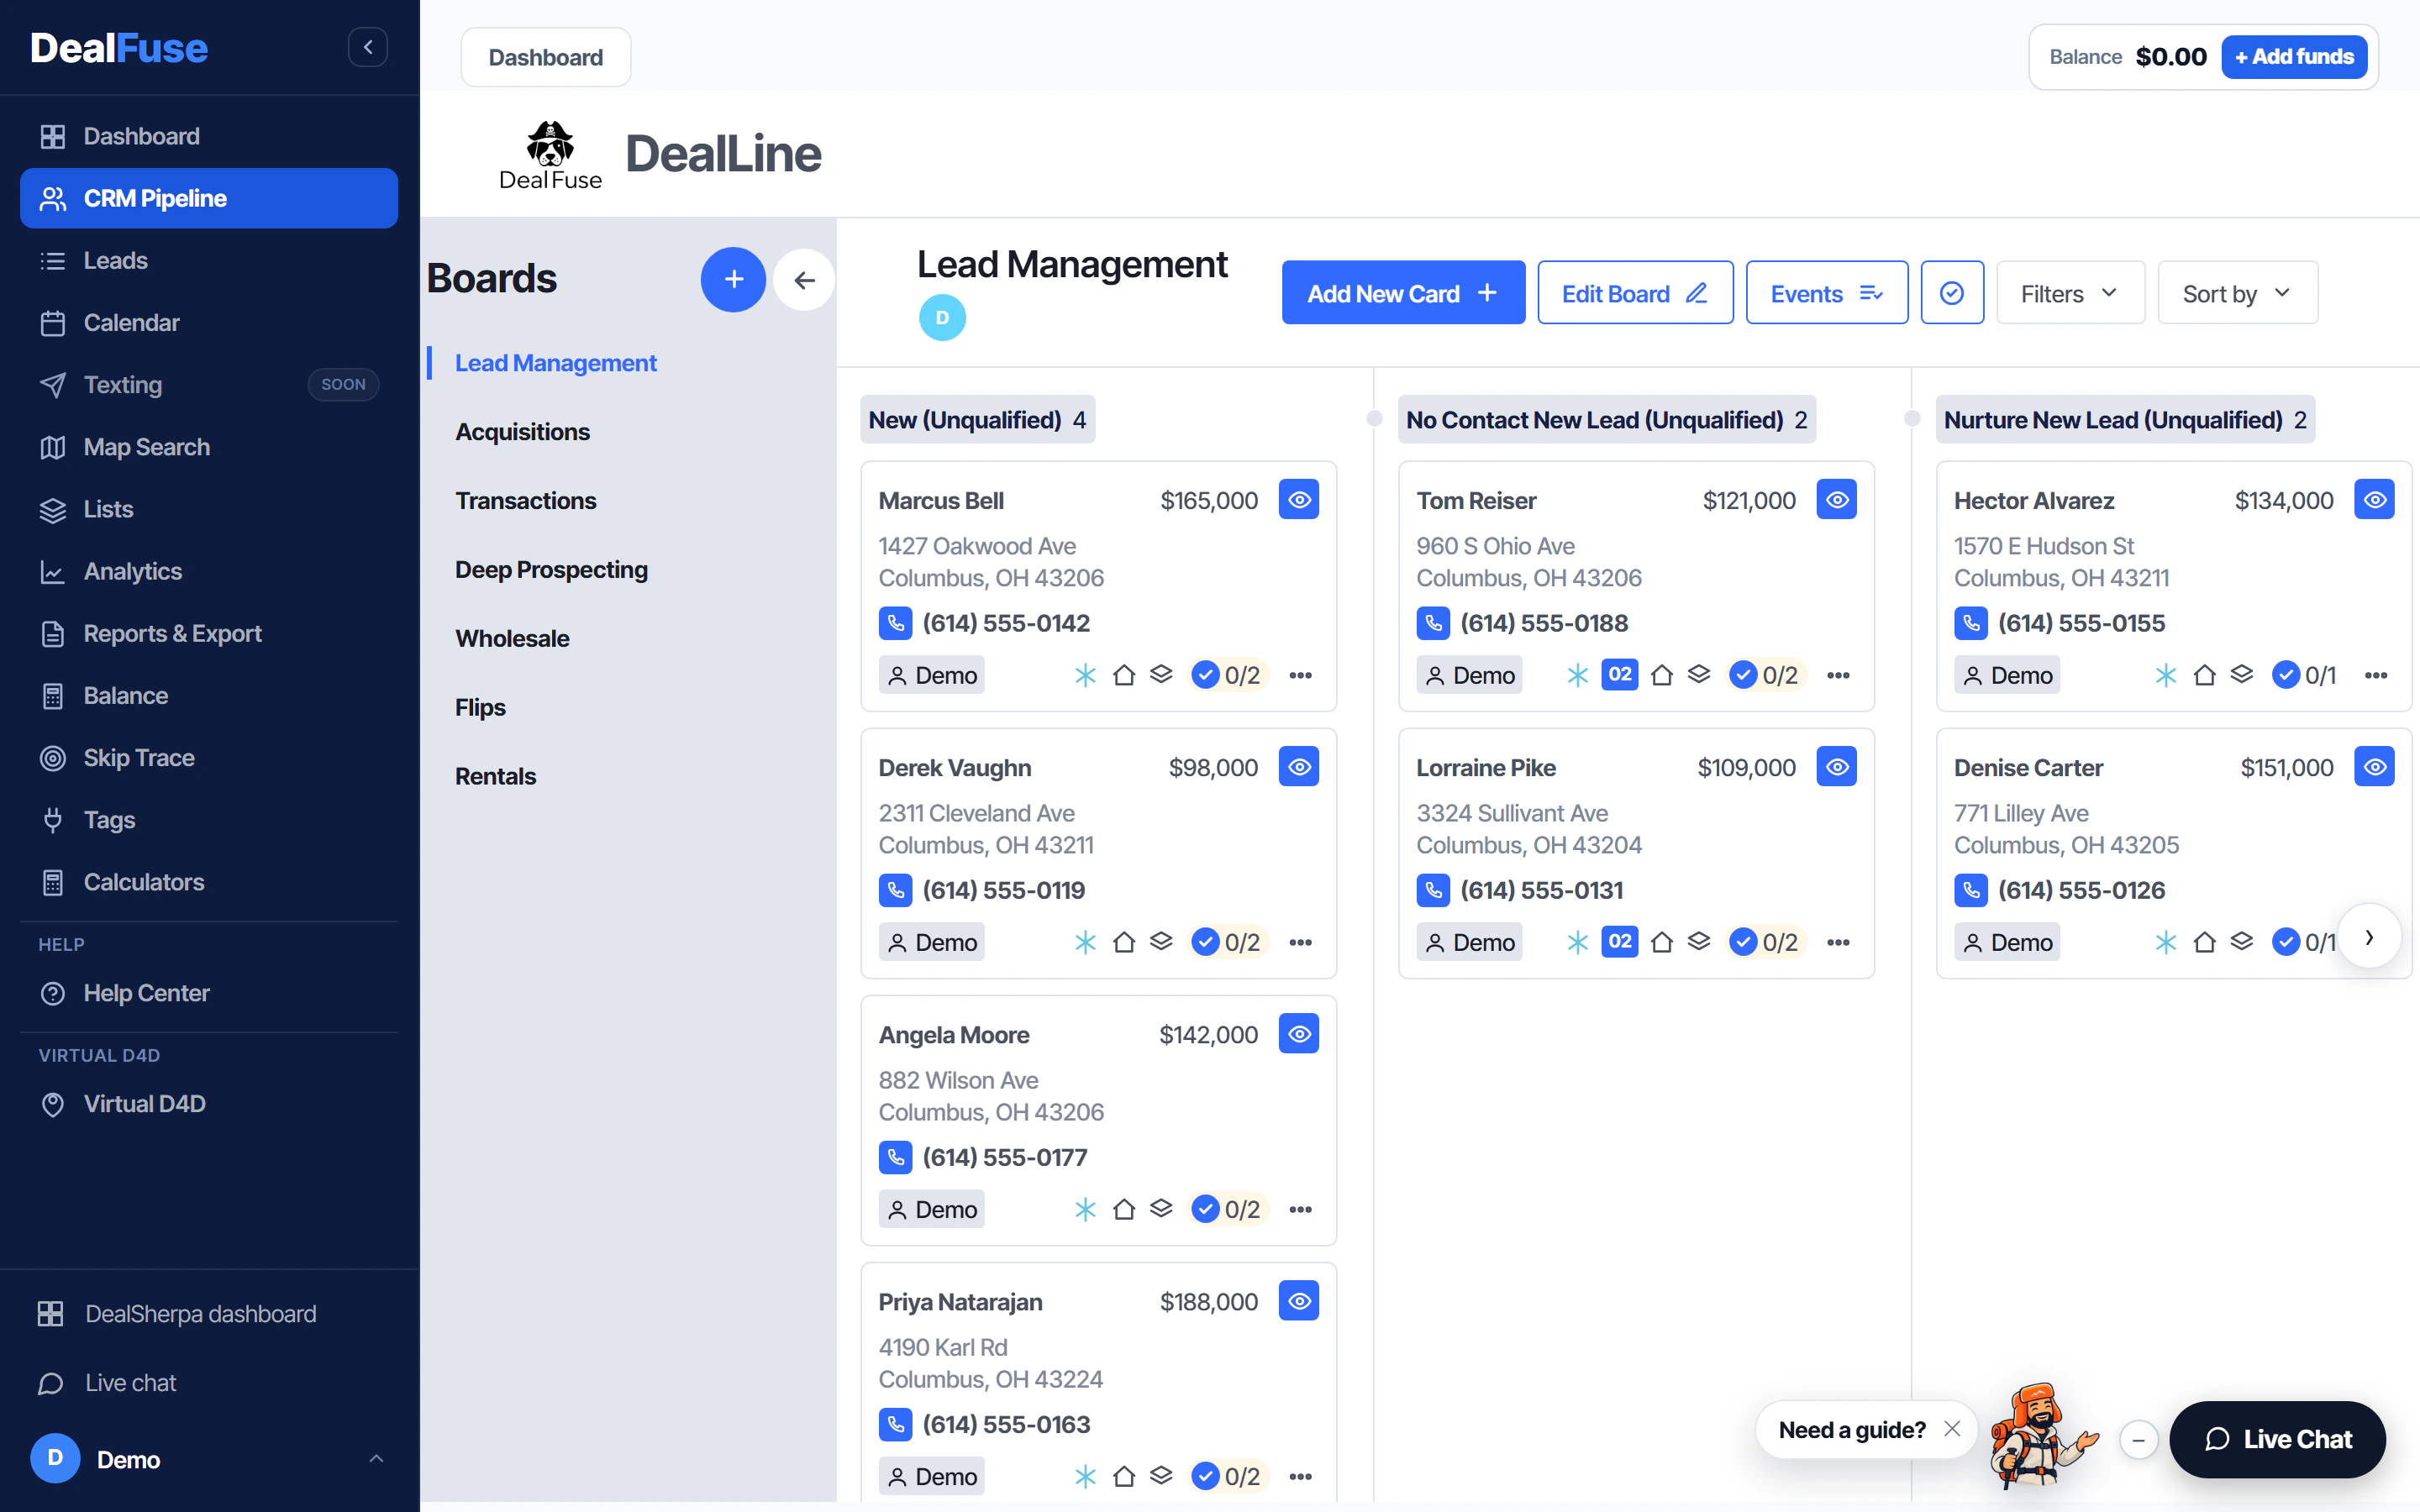
Click › on the right edge to scroll the board sideways, or hide the boards panel with the arrow next to Boards.
Add a new lead
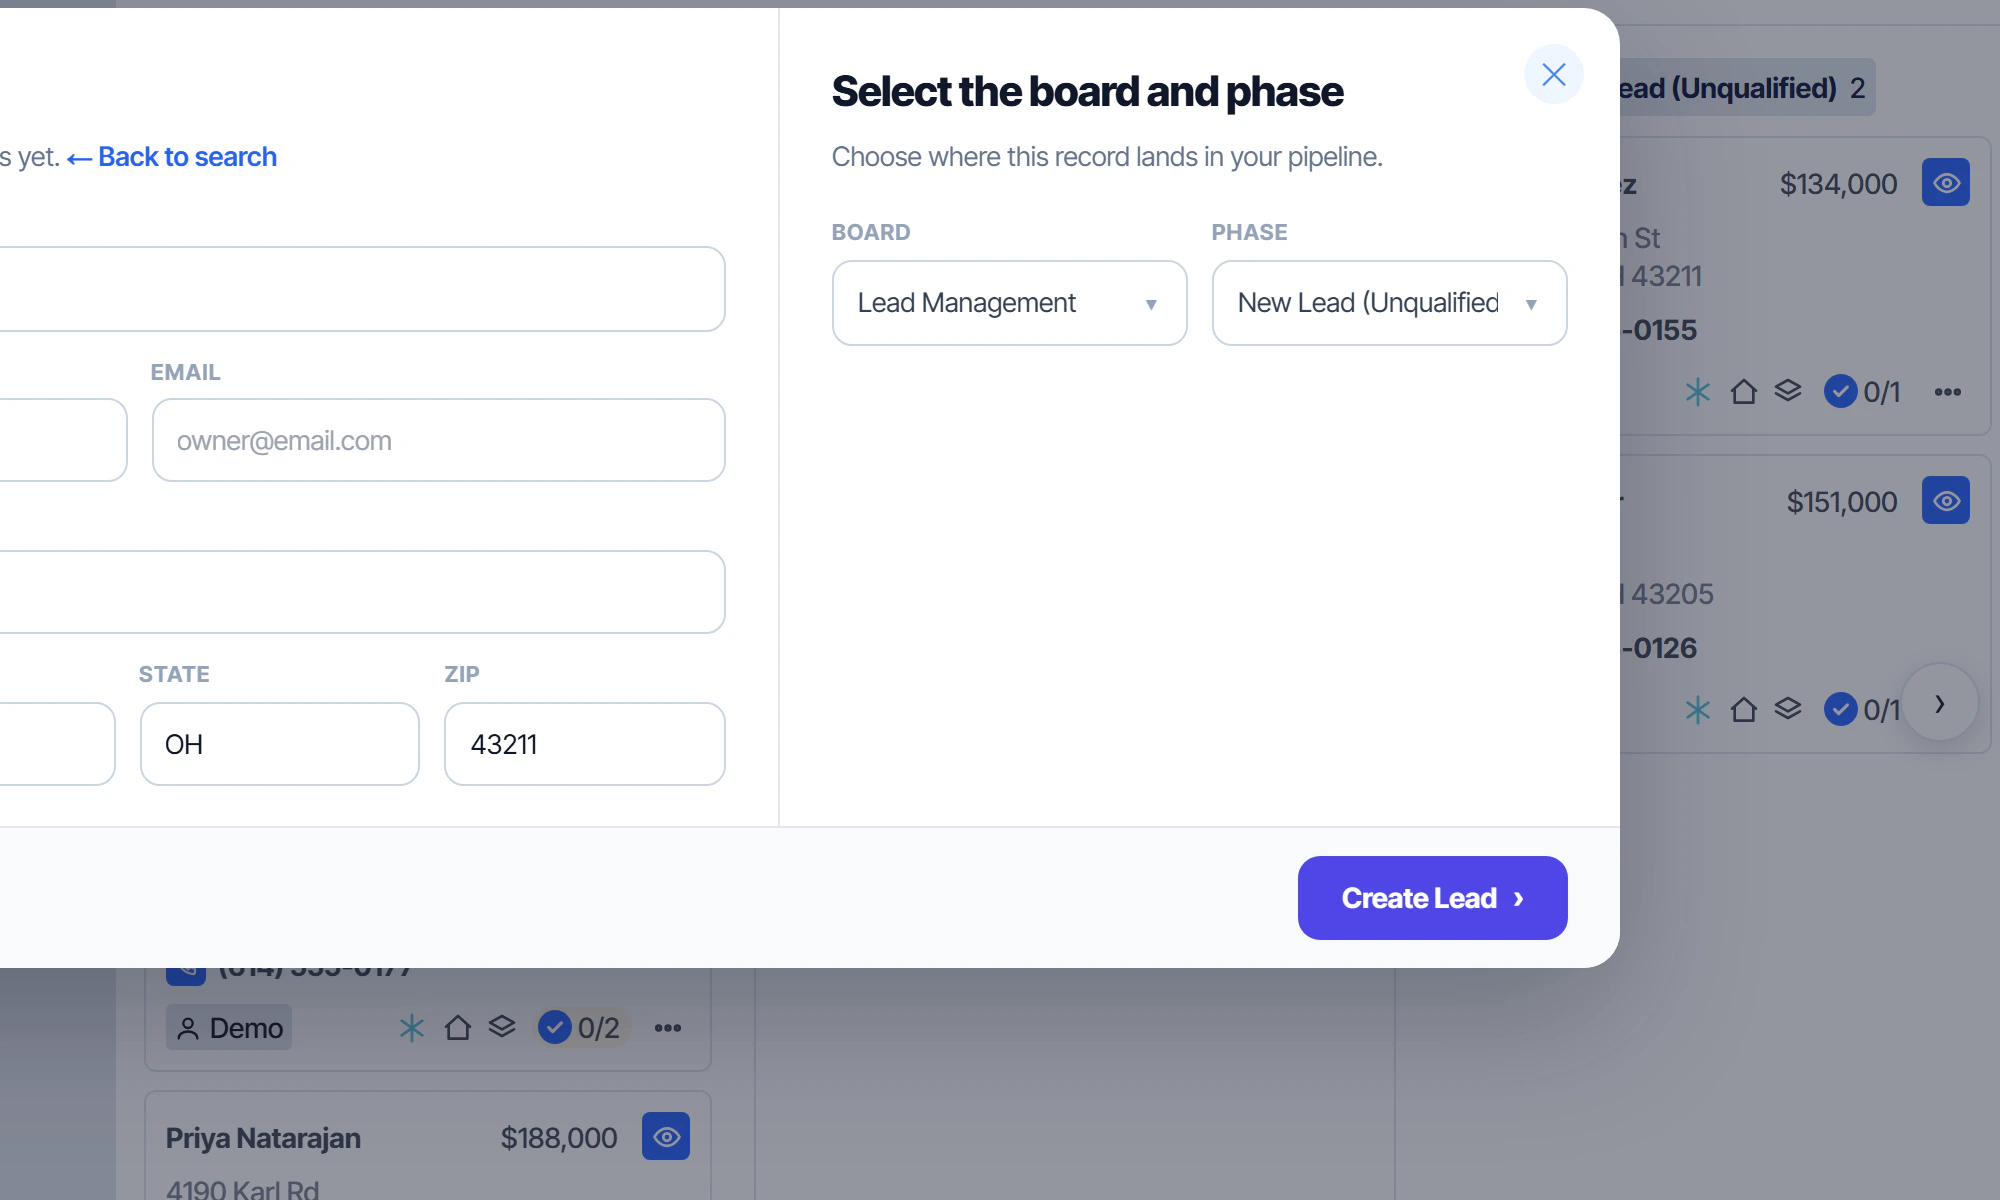
When you create the lead you choose its board and where it goes in the category. It starts its first to-do right away, so nothing slips.
- 1
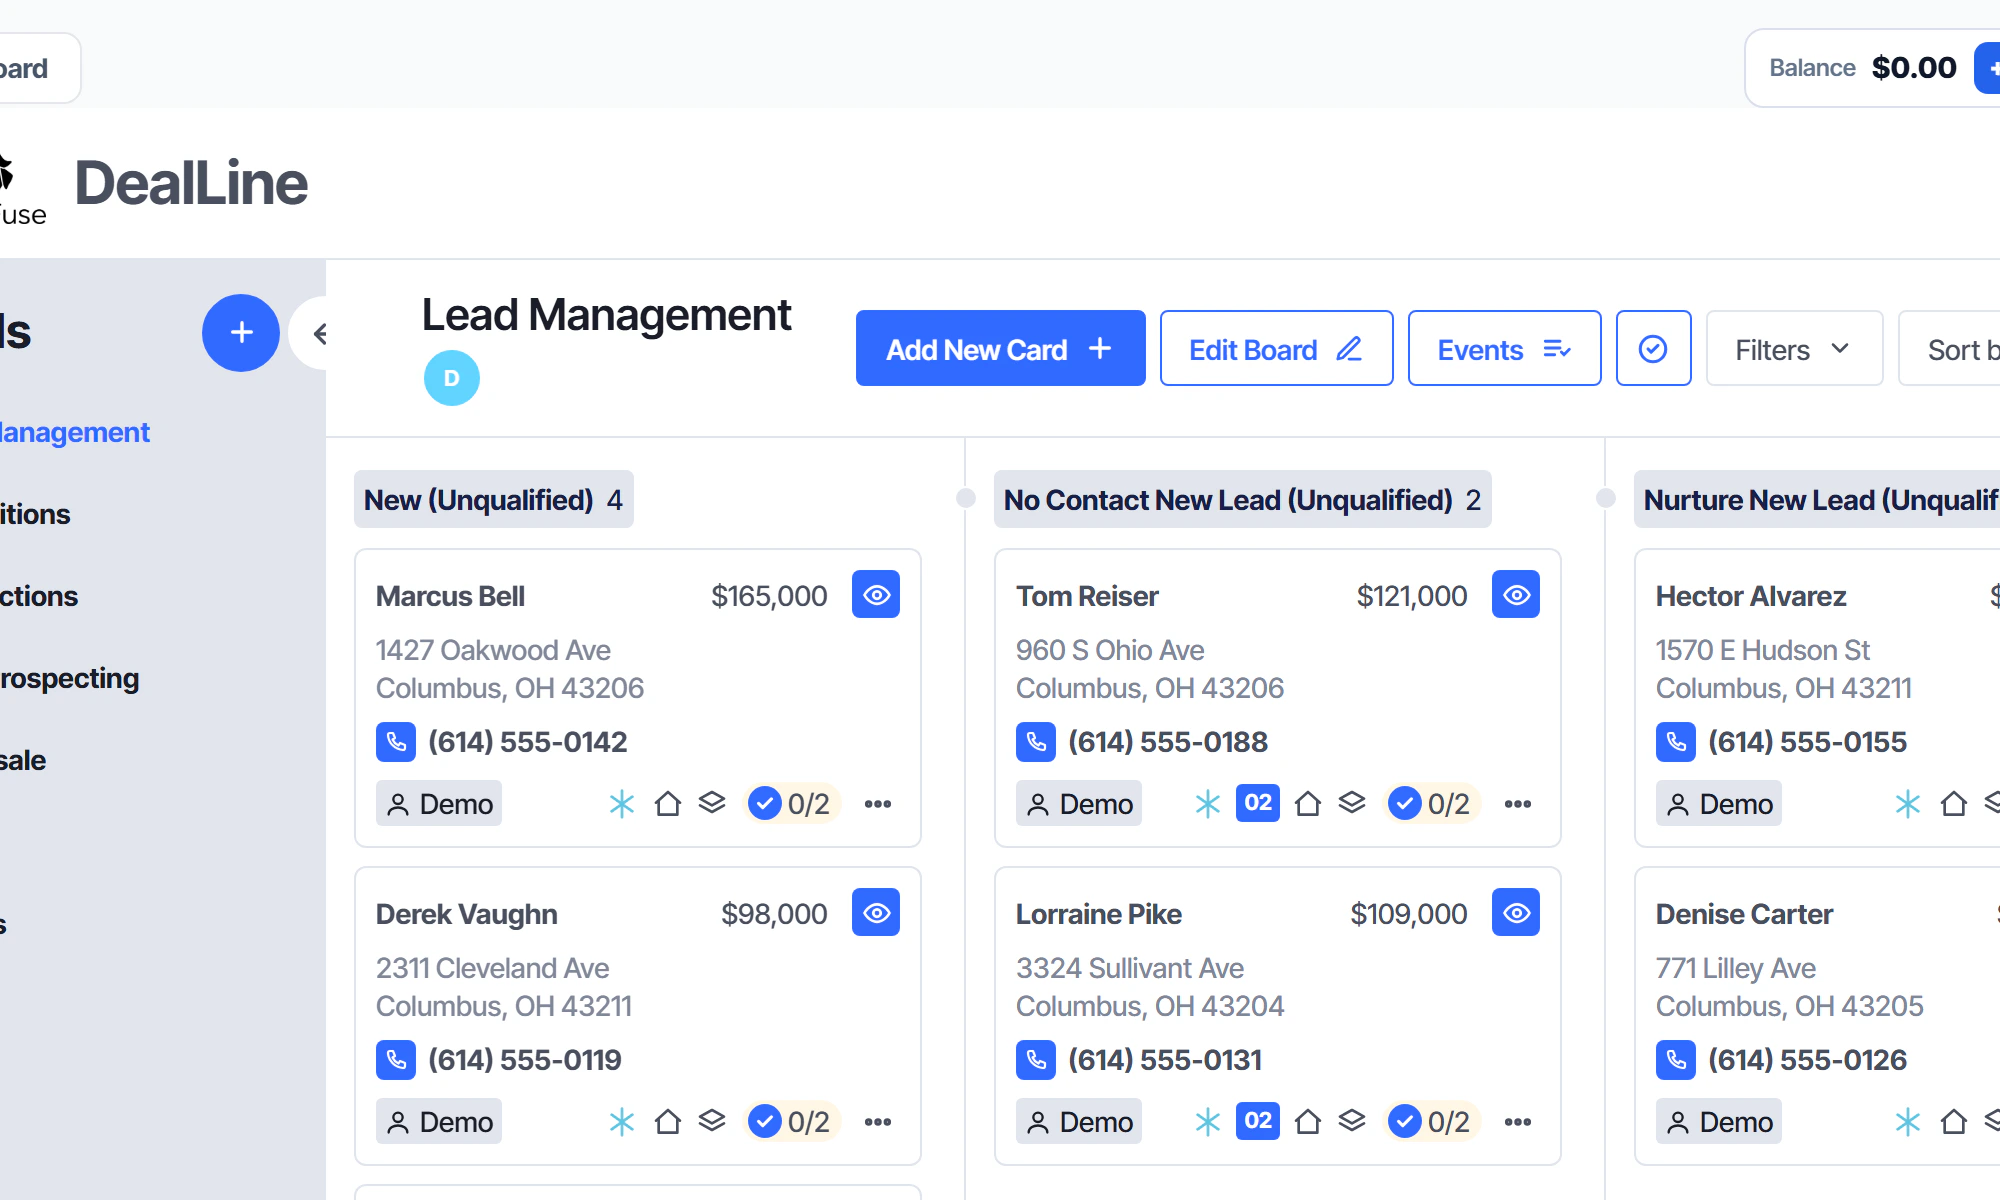
Click Add New Card.
- 2
Fill in the seller and the property, pick the board and the category it starts in, and click Create Lead.
- 3
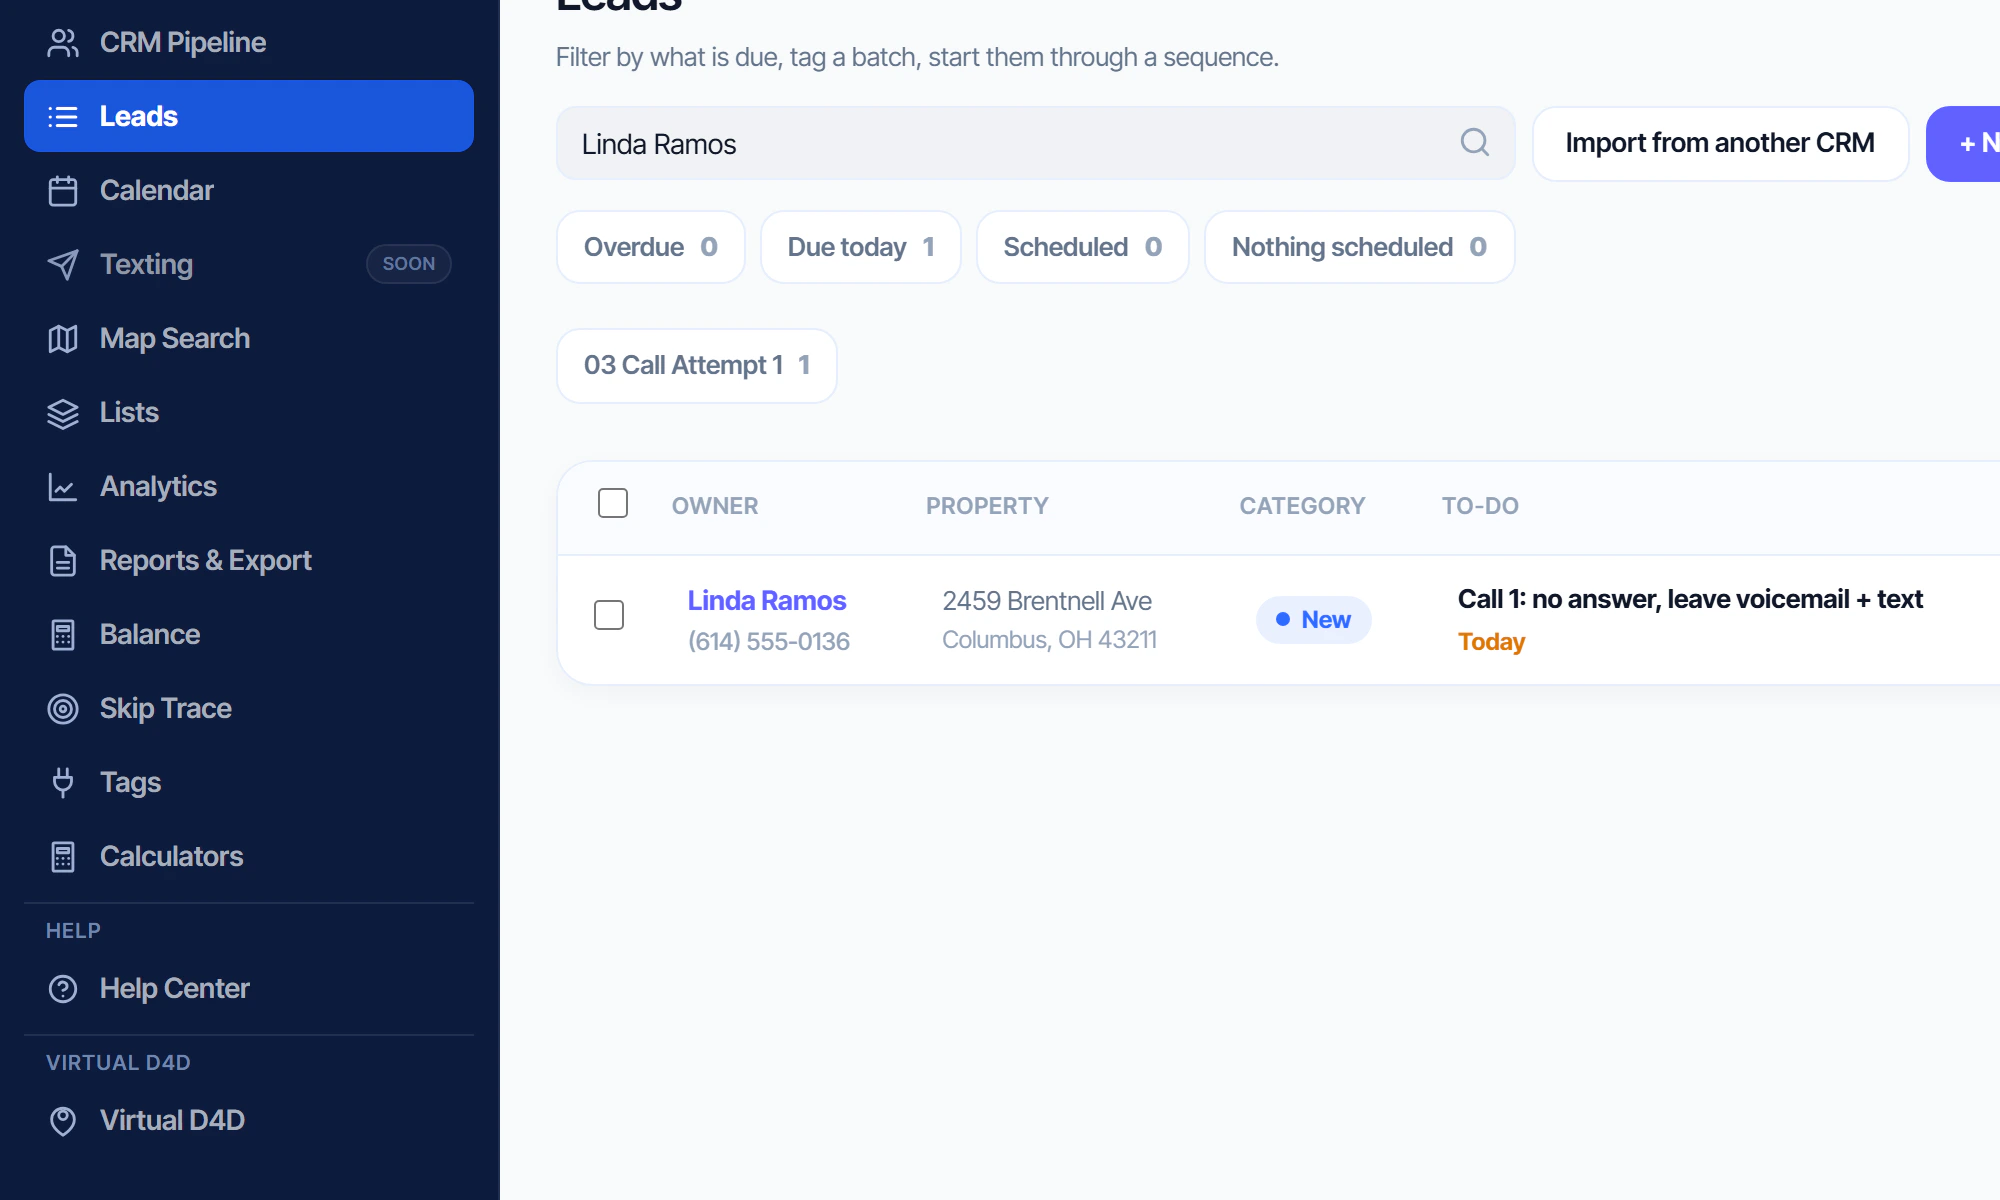
The lead is in your list with its first to-do. Click the seller's name to open it.
Write notes on the Message Board
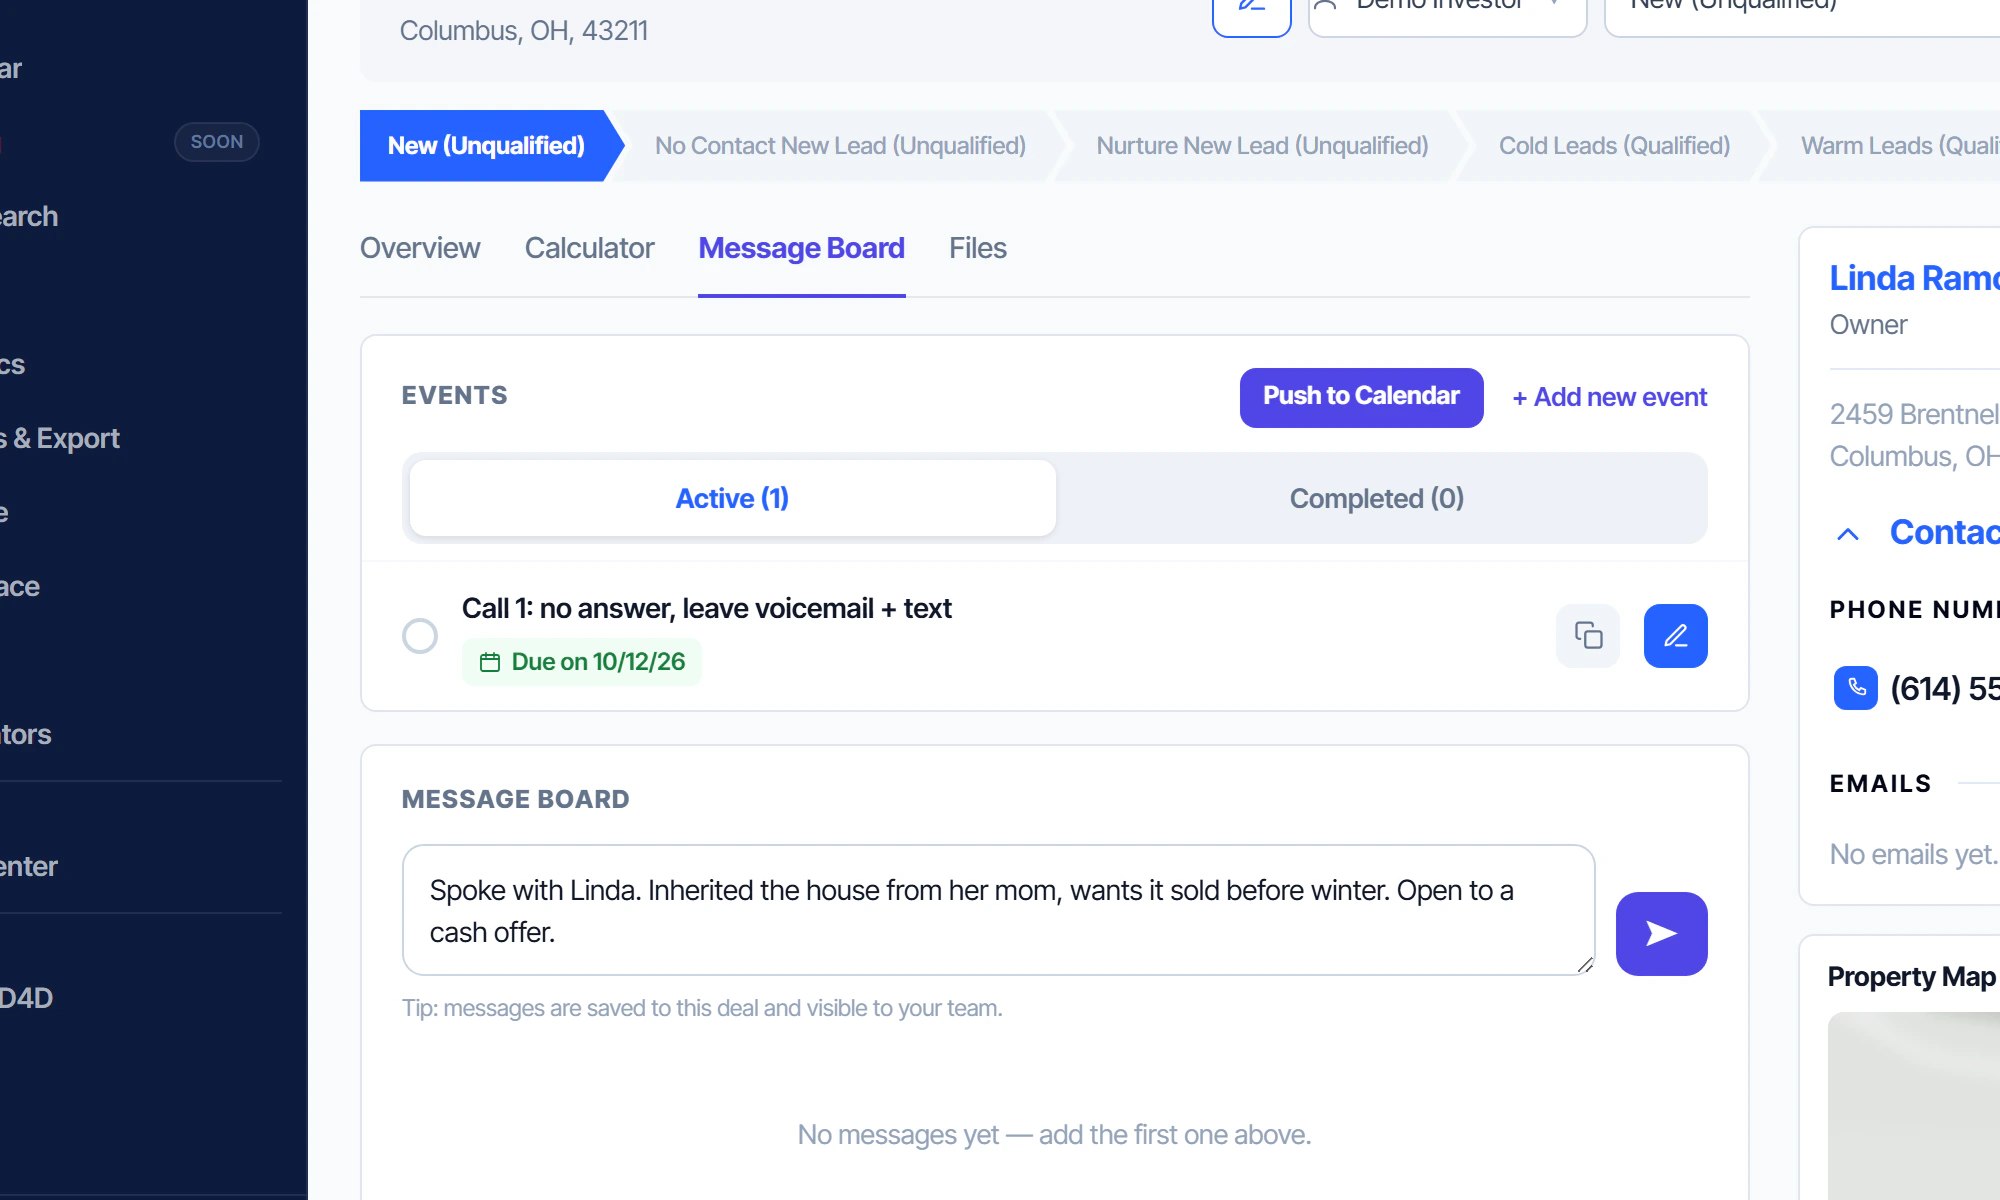
Use the Message Board for the notes from your conversation. Every note for the lead is in one place, for you and your team.
- 1
Click Message Board, type your notes and press Enter to save.
Change the status
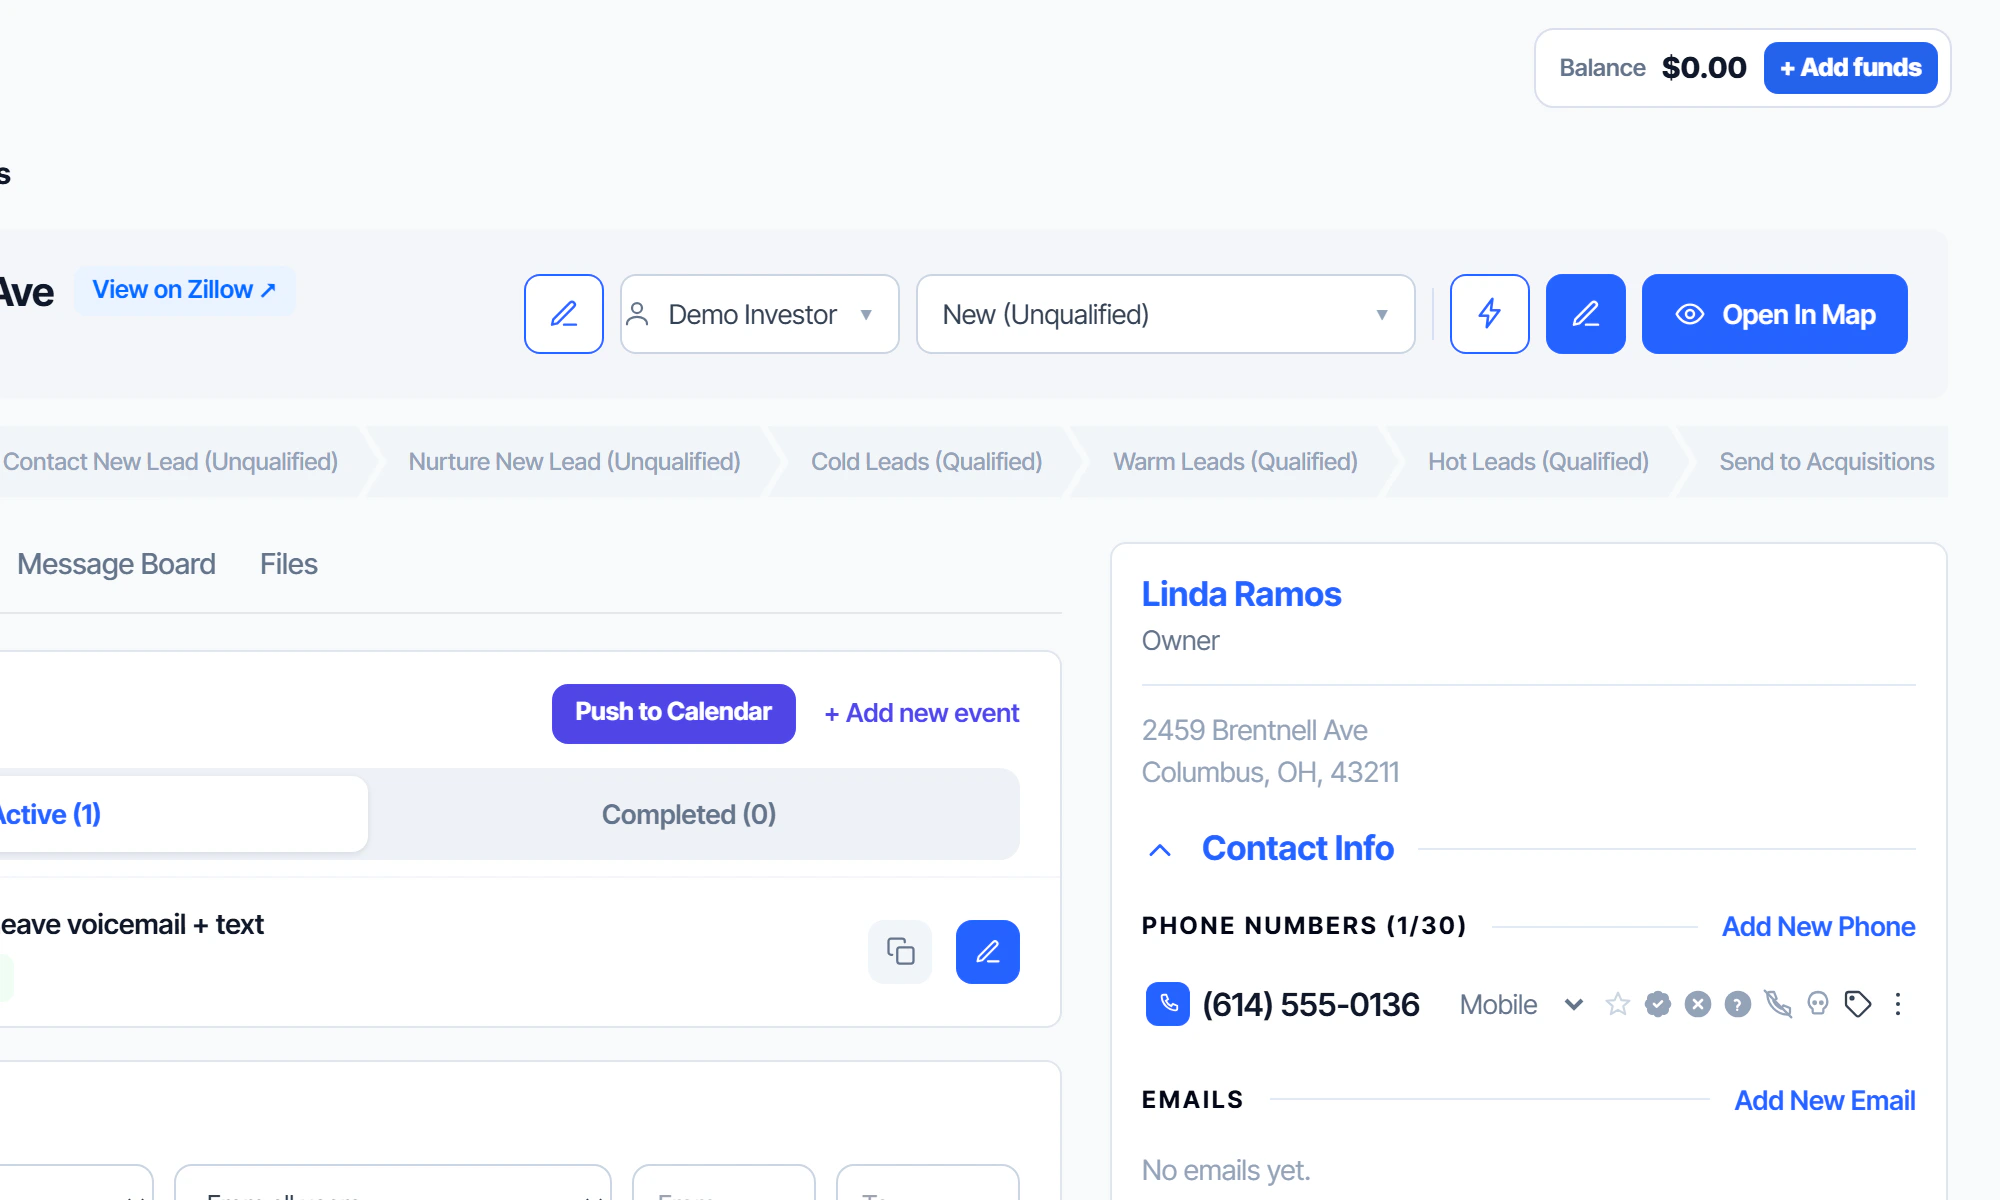
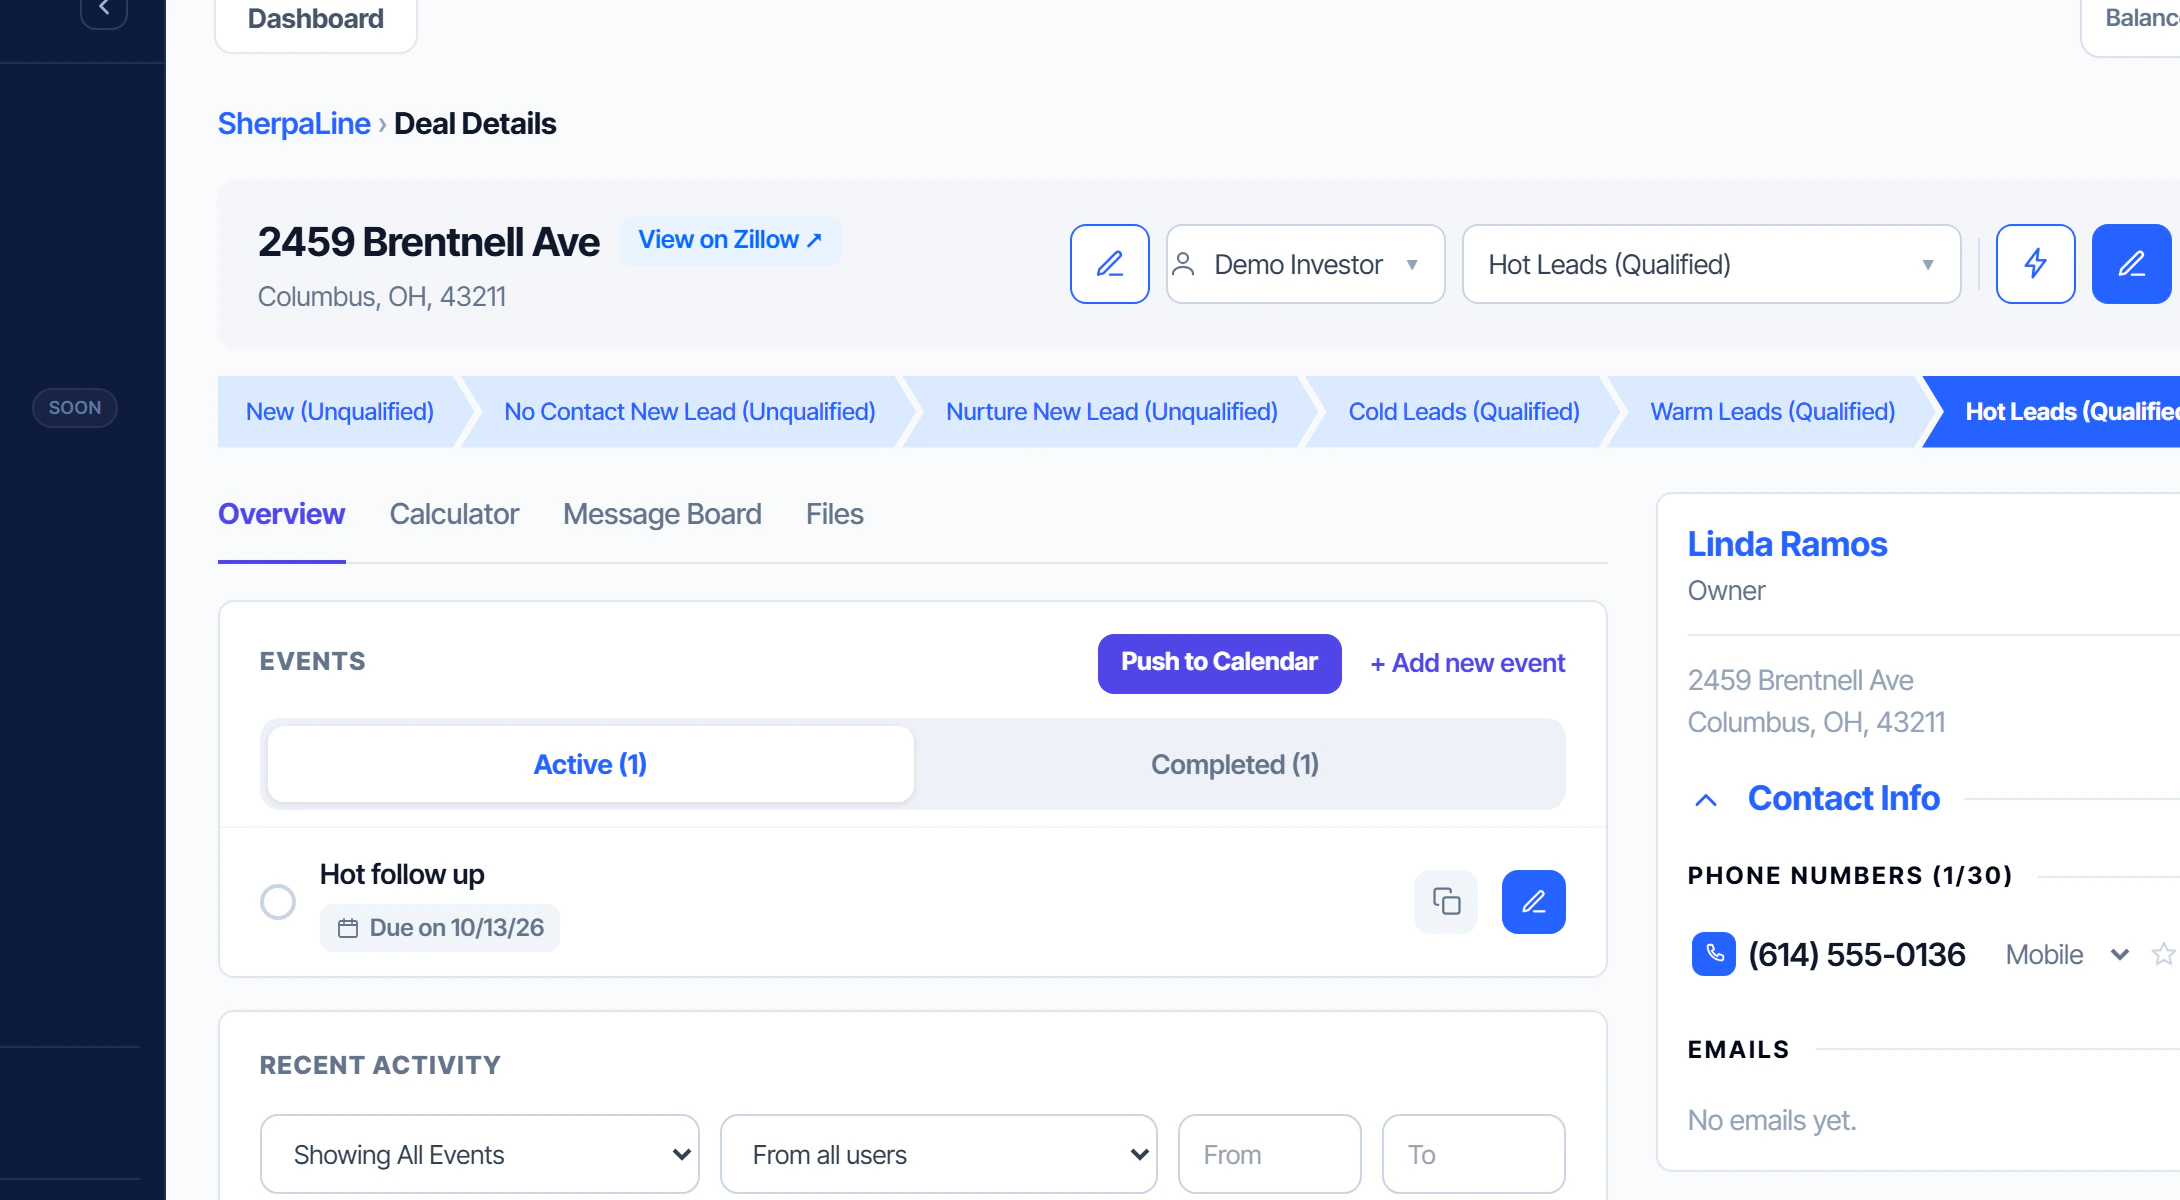
The category drop-down at the top right of the lead sets where it stands. The open to-do changes the moment you pick a new one.
- 1
Open the drop-down at the top right and choose the new category. Here, Hot Leads.
- 2
The to-do switches by itself: a Hot lead gets a Hot follow up tomorrow.
Book the appointment
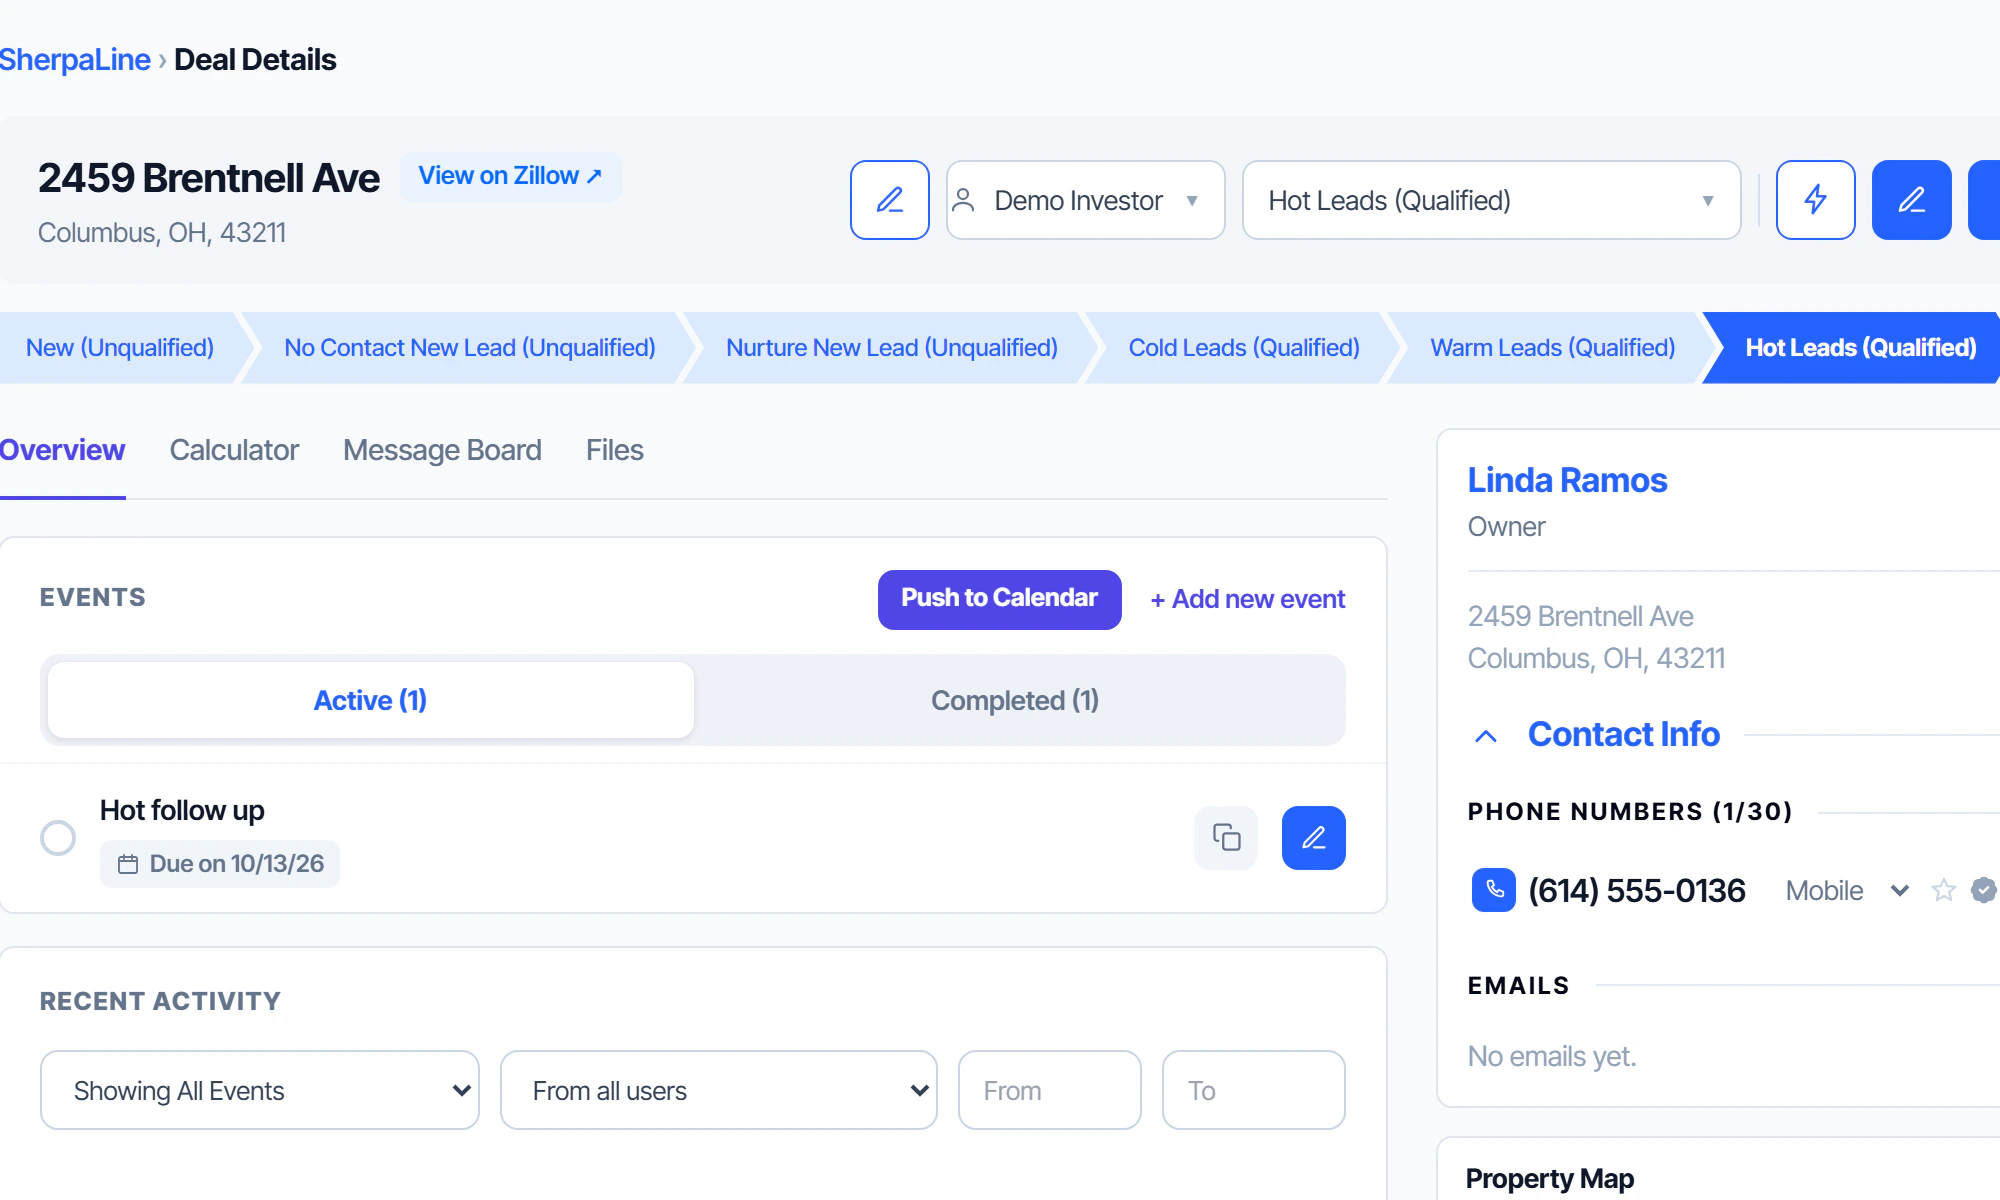
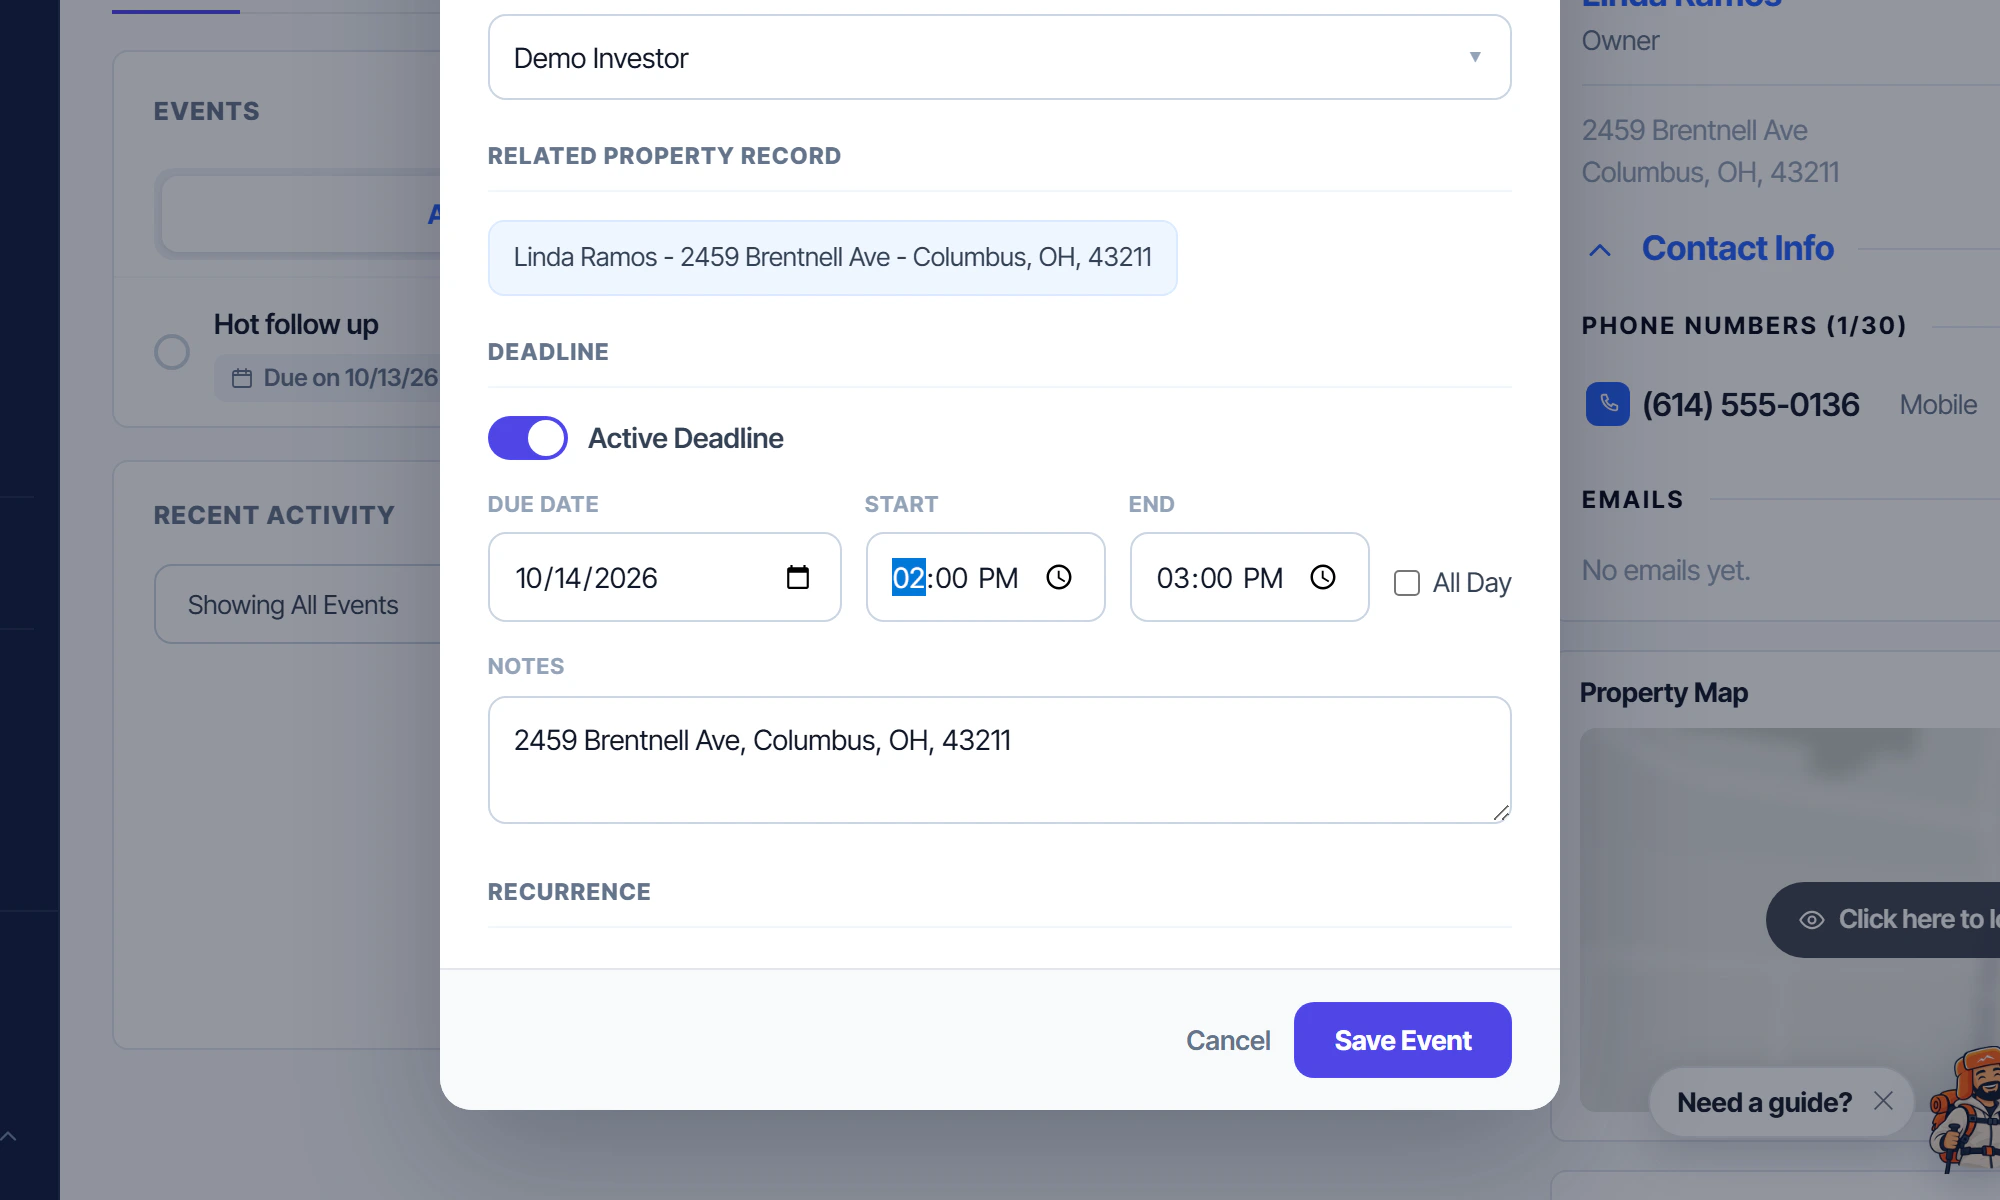
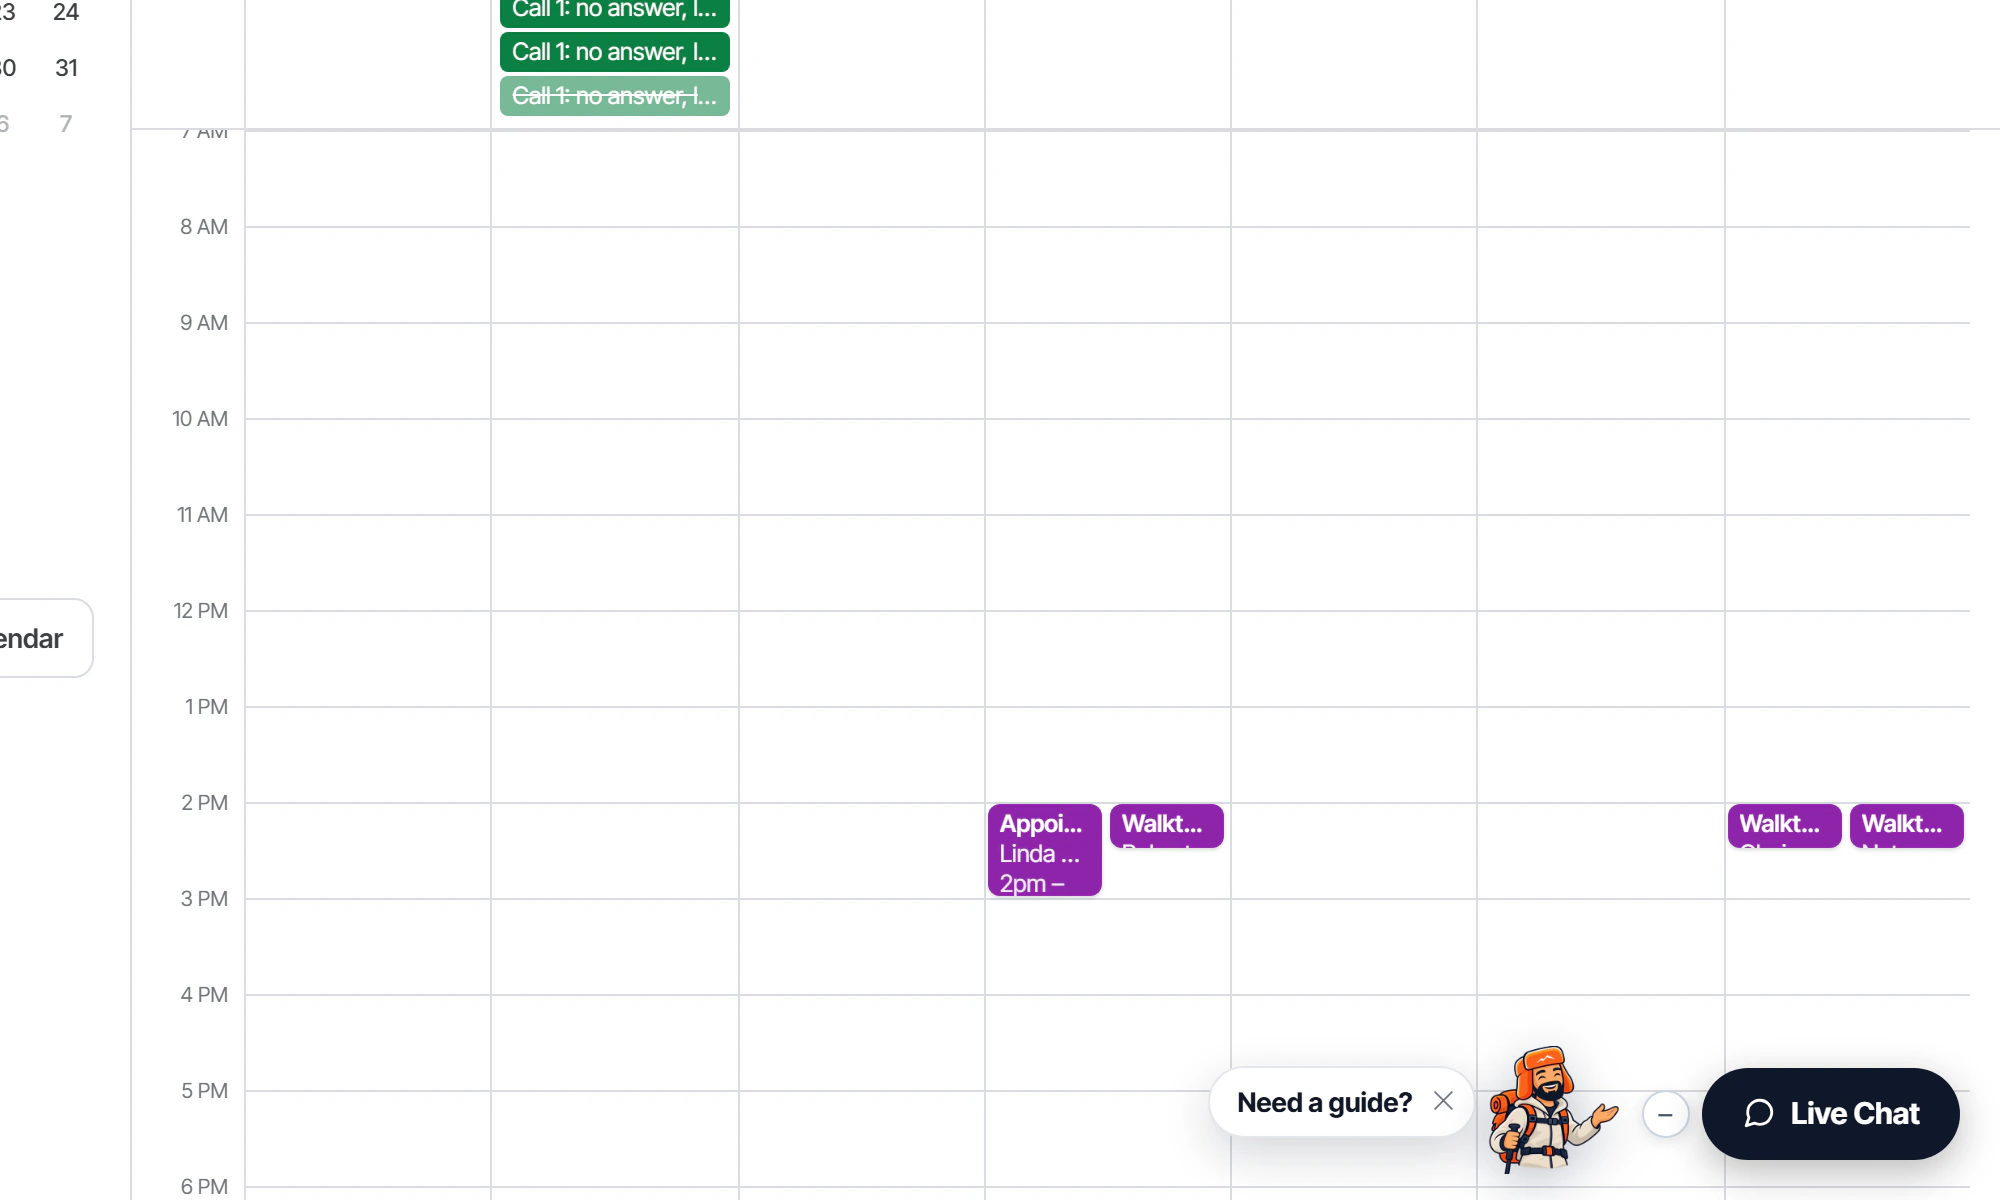
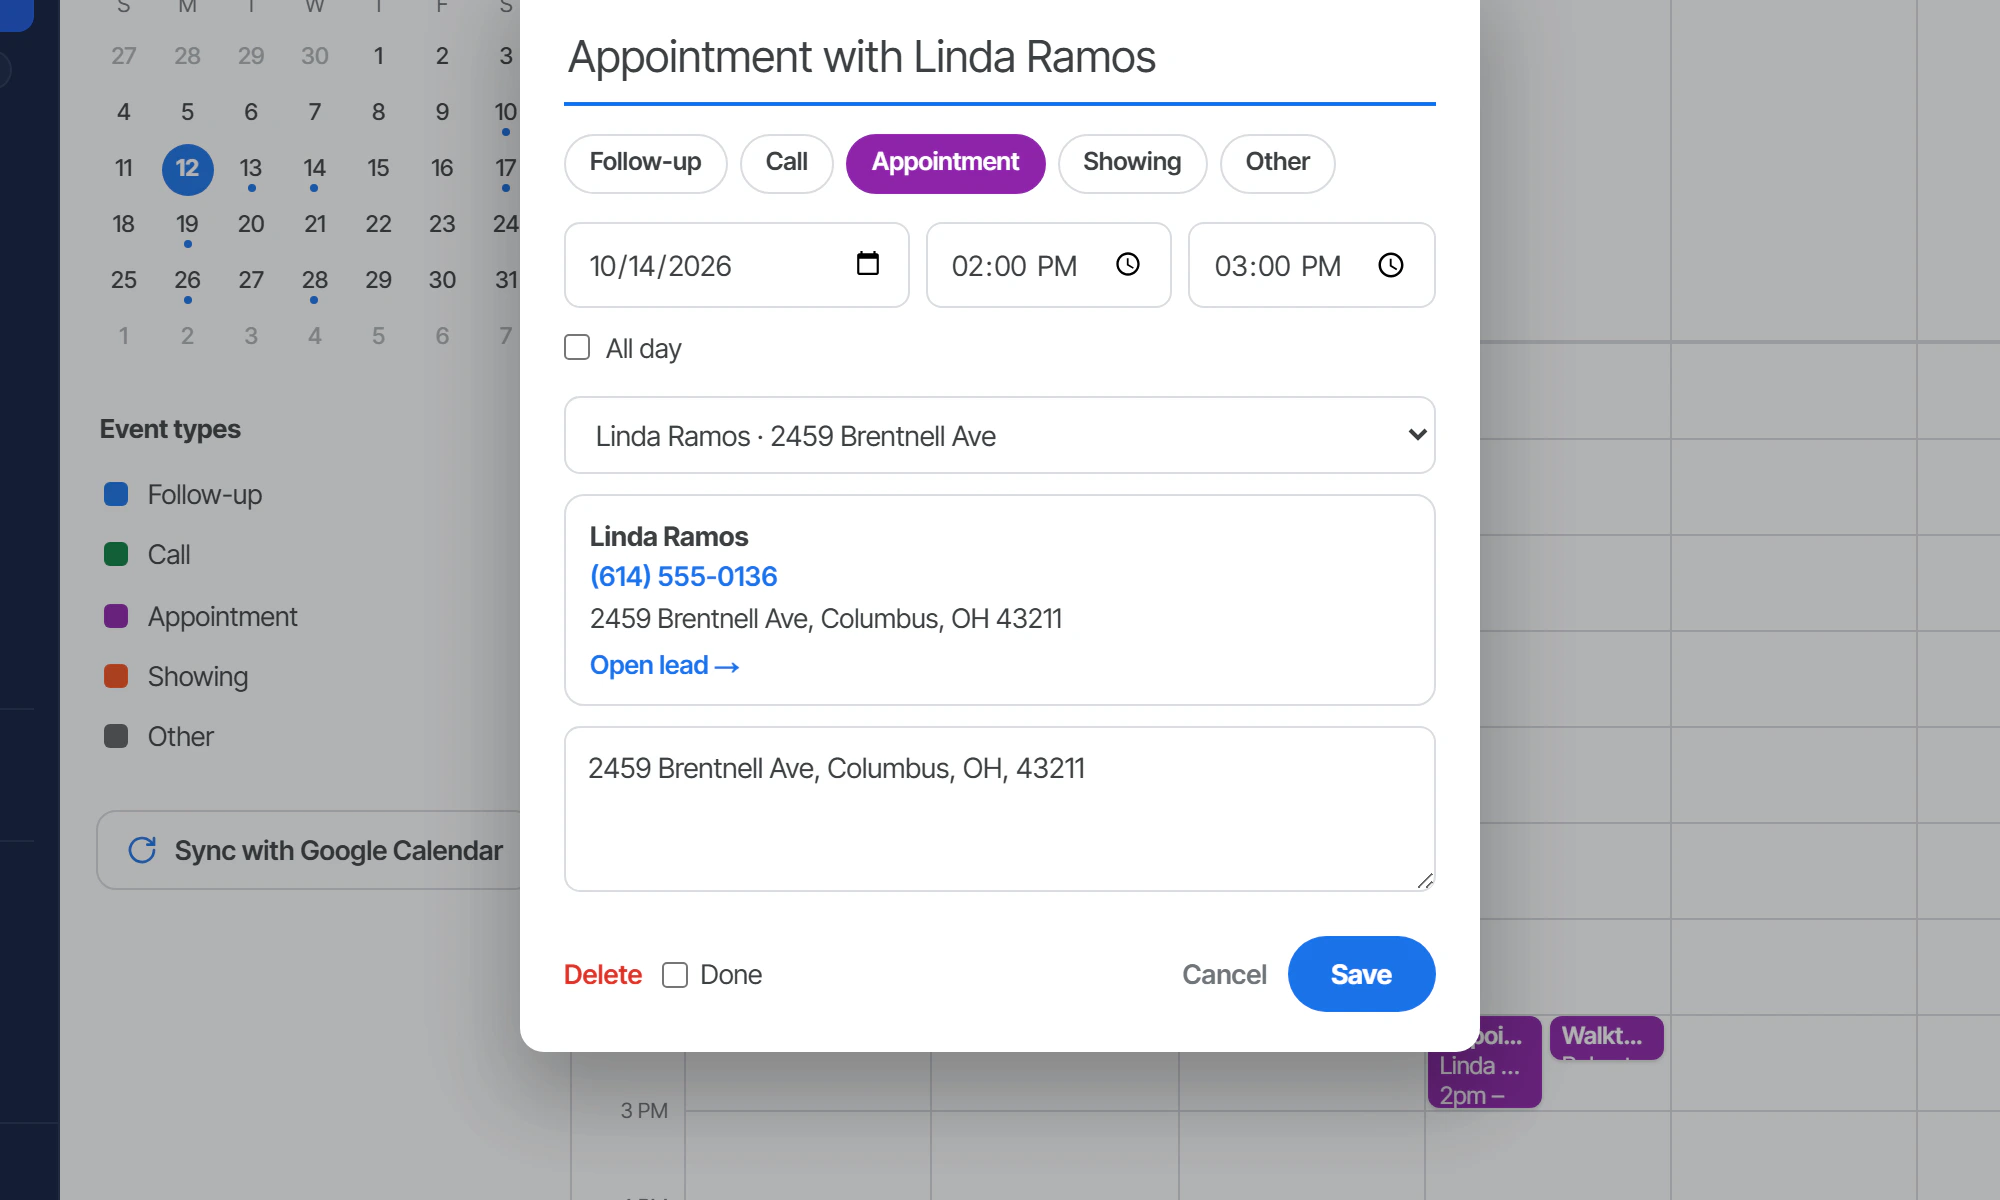
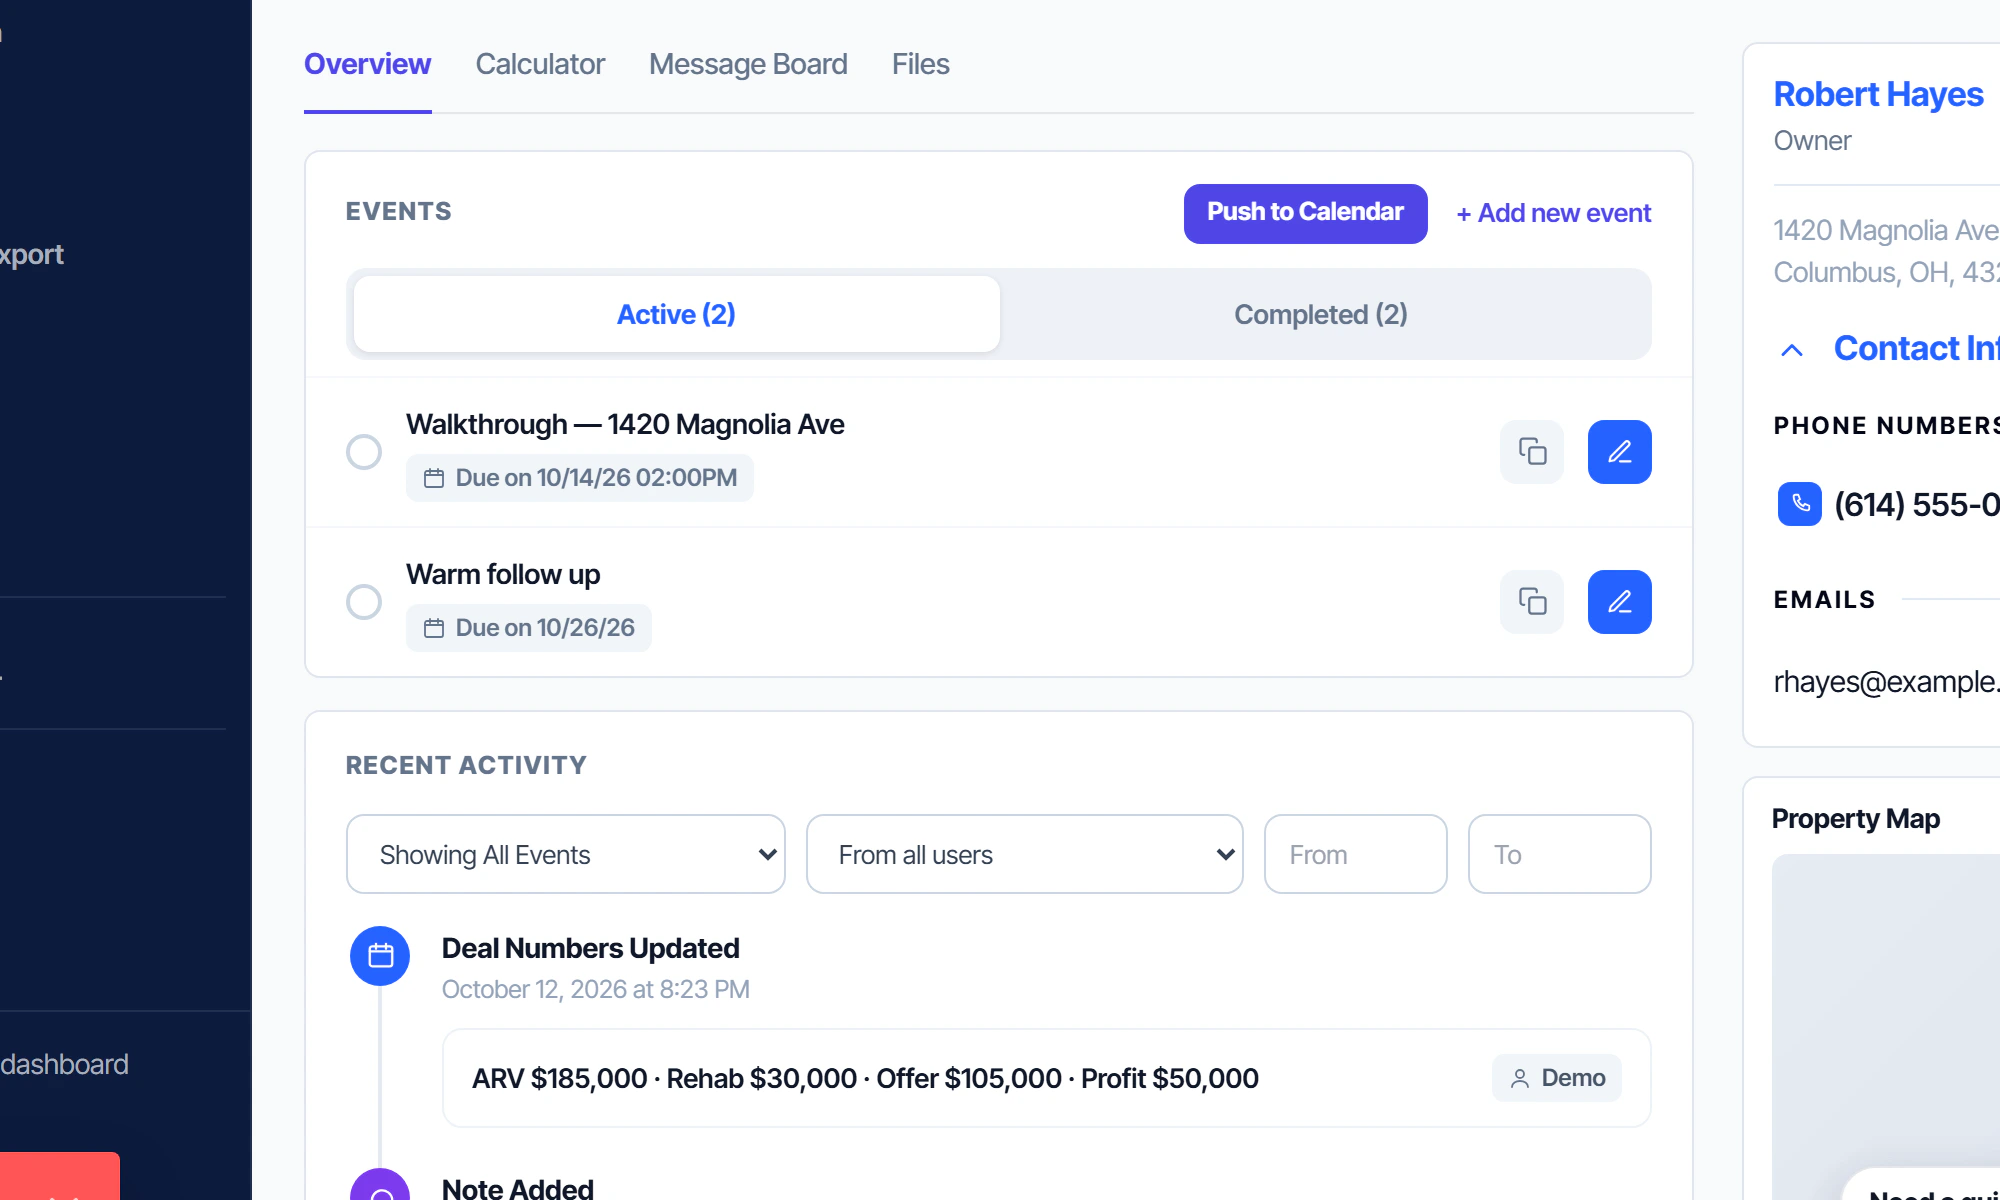
Push to Calendar books the appointment straight from the lead. On the Calendar, the appointment shows the seller's name, phone number and the property address.
- 1
Click Push to Calendar in the Events box.
- 2
Set the date and time (here, tomorrow at 2 PM) and click Save Event.
- 3
The appointment is on your Calendar.
- 4
Click it to see the seller's phone number (tap to call) and the address (opens in Maps).
Your to-dos for the day
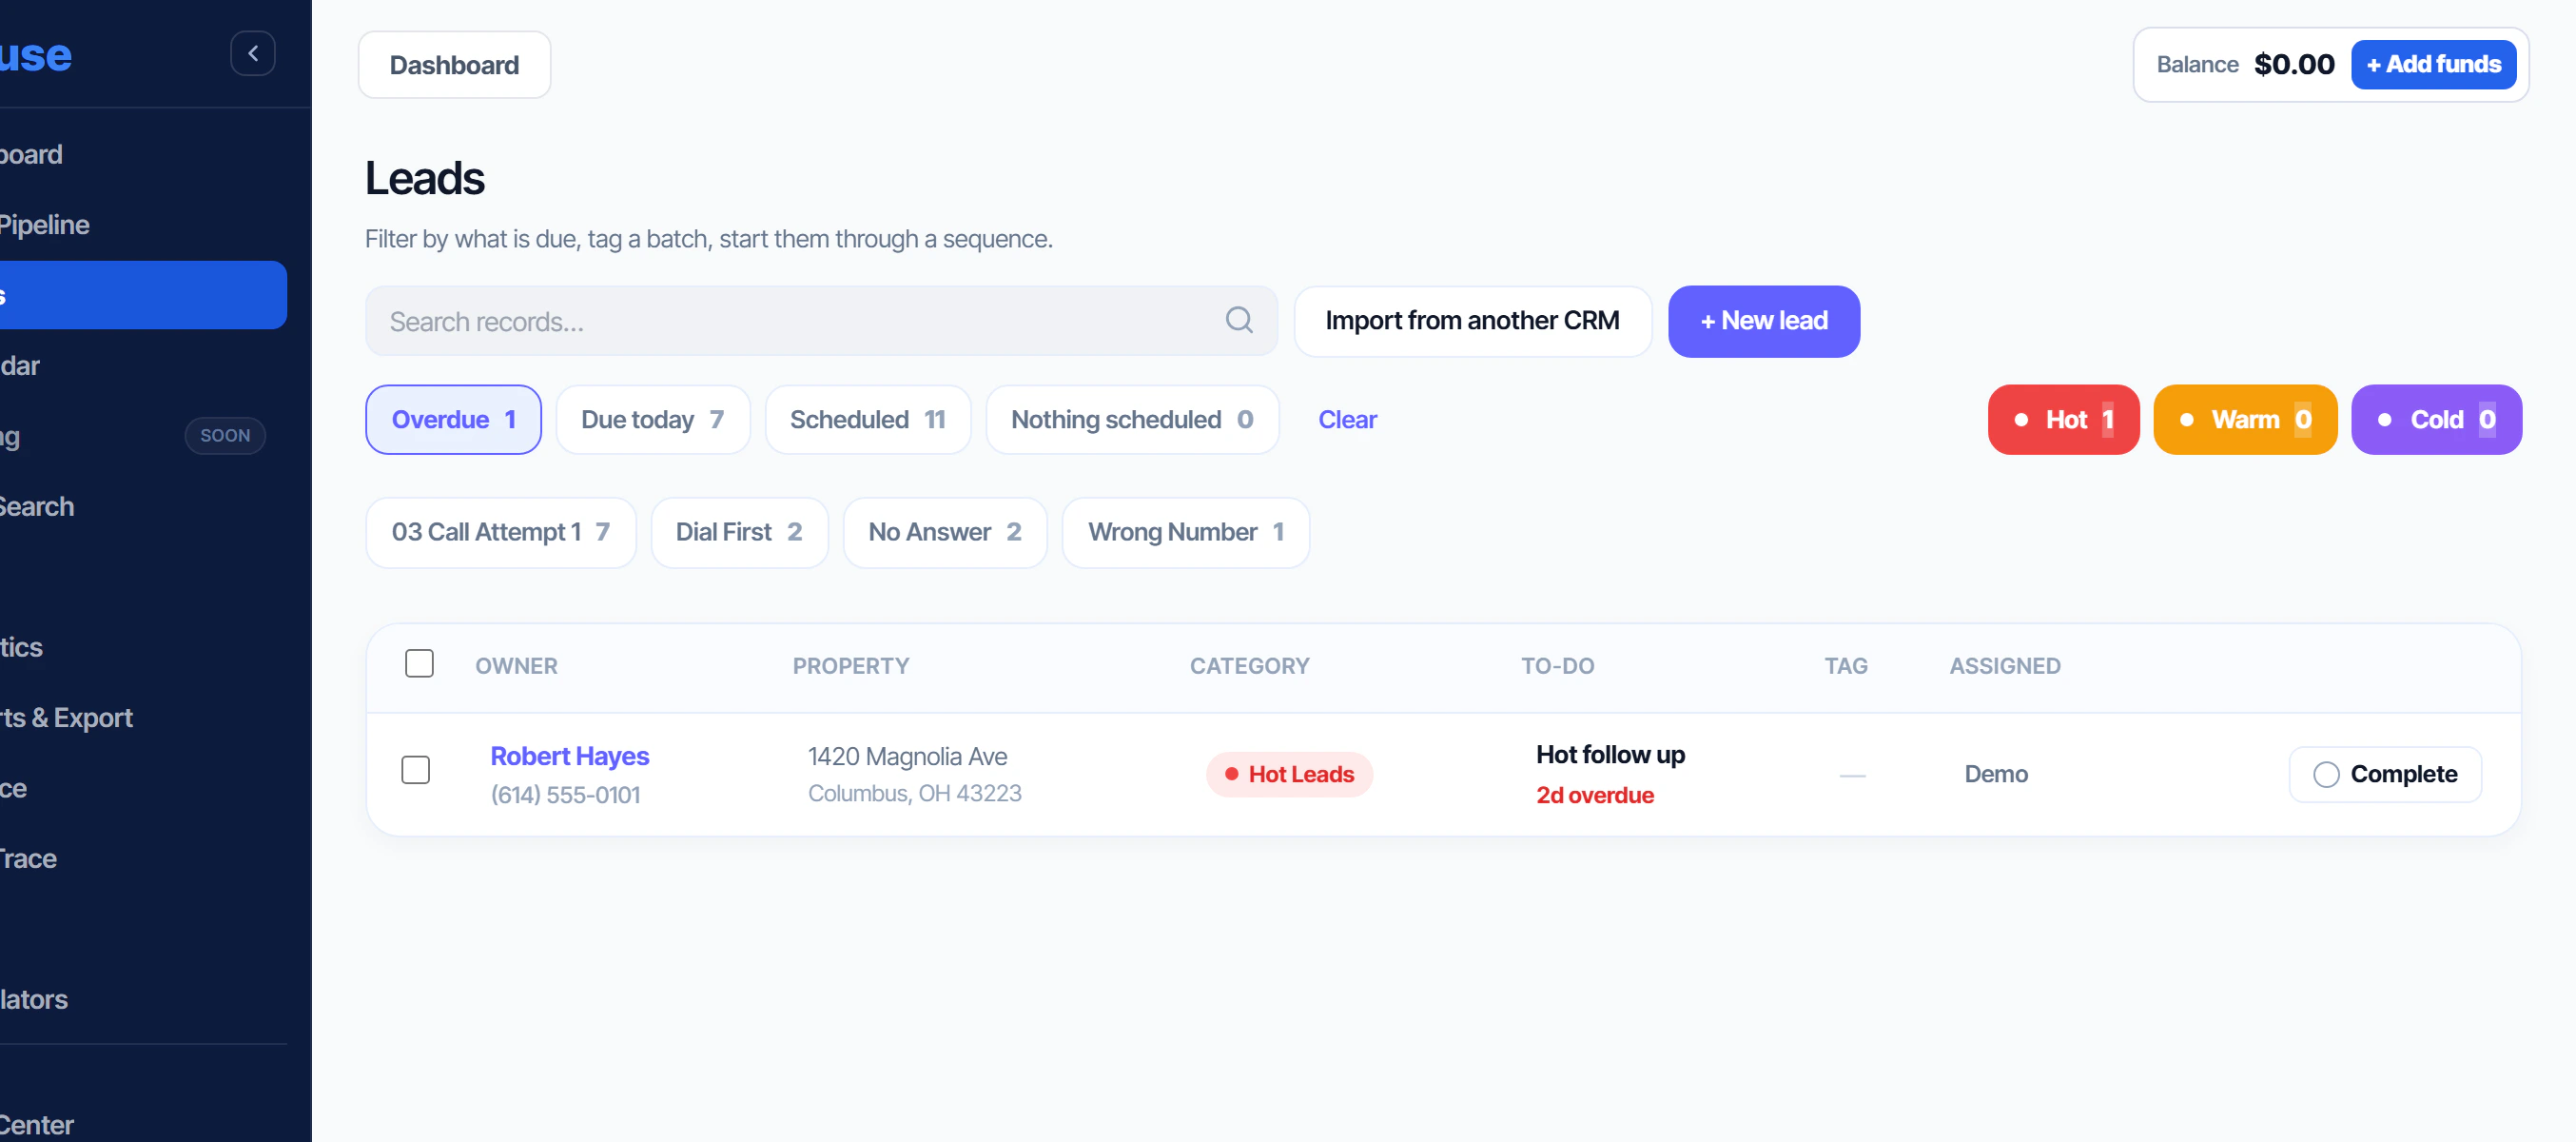
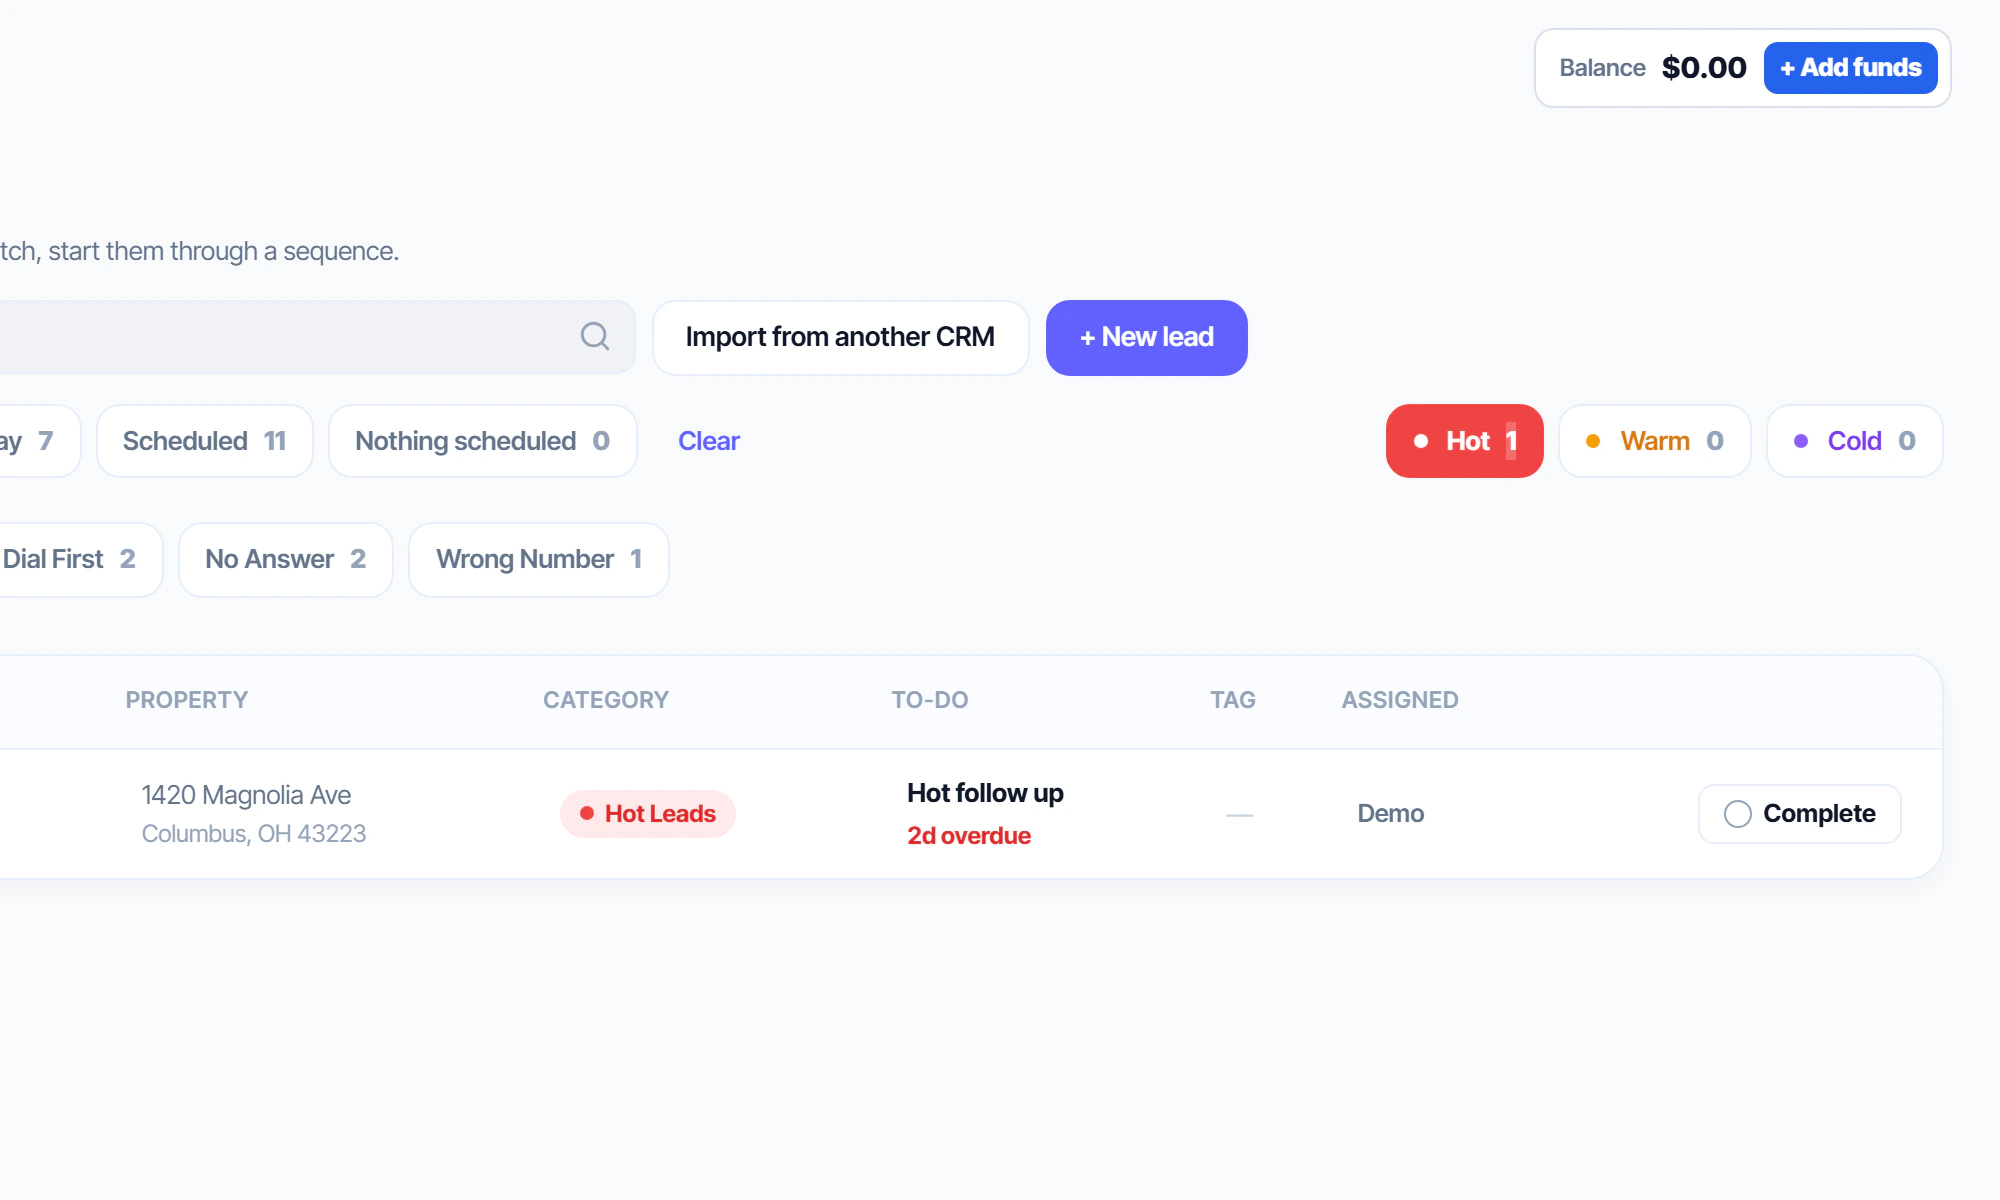
Leads is where you see the day's to-dos. Overdue, Due today and Scheduled filter by what's due; Hot, Warm and Cold on the right narrow it to the categories you want to work first. All three start switched on; click one to switch it off.
- 1
Click Overdue to see the to-dos past their date.
- 2
Switch off Warm and Cold to work only the hot leads.
Work a to-do
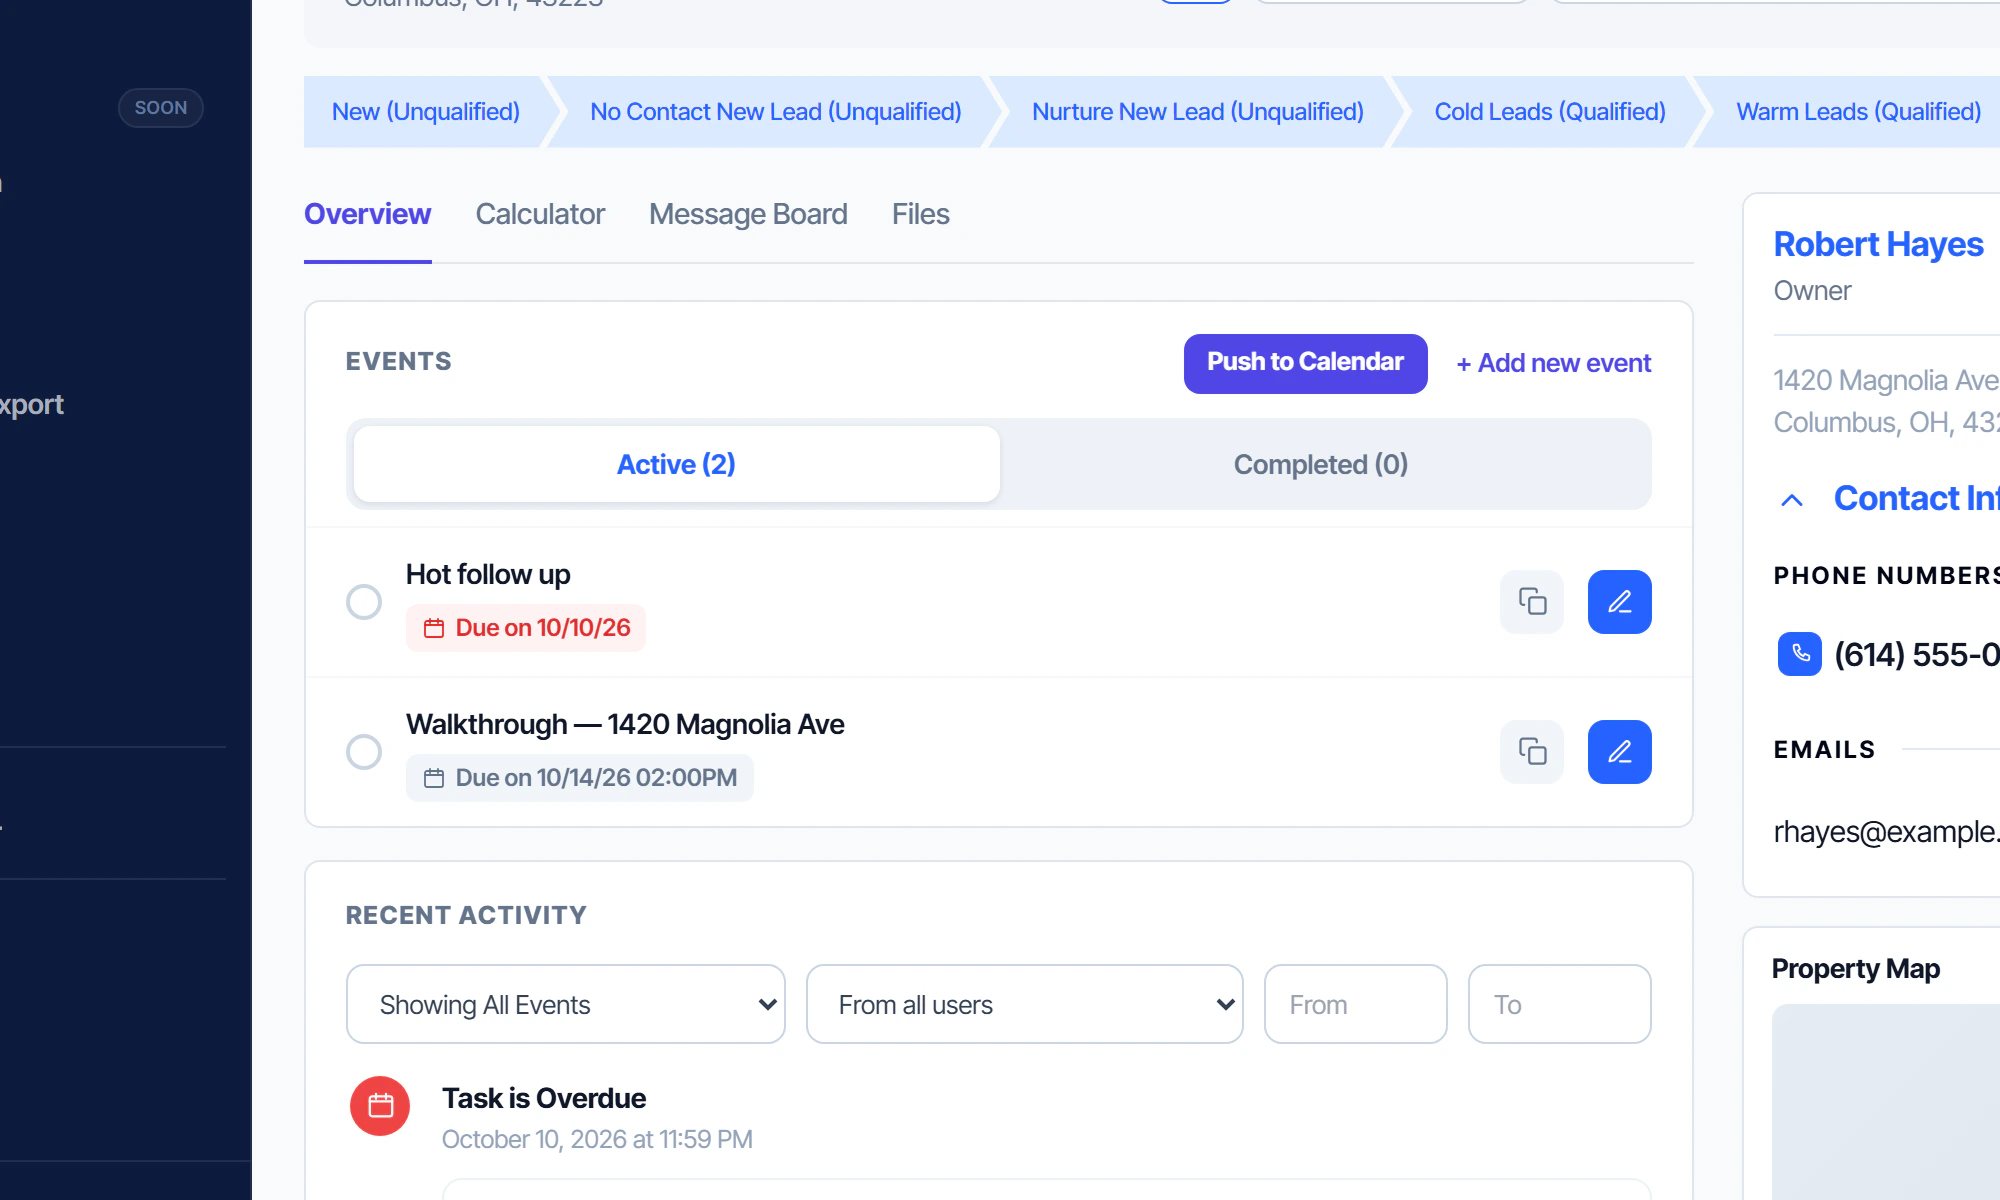
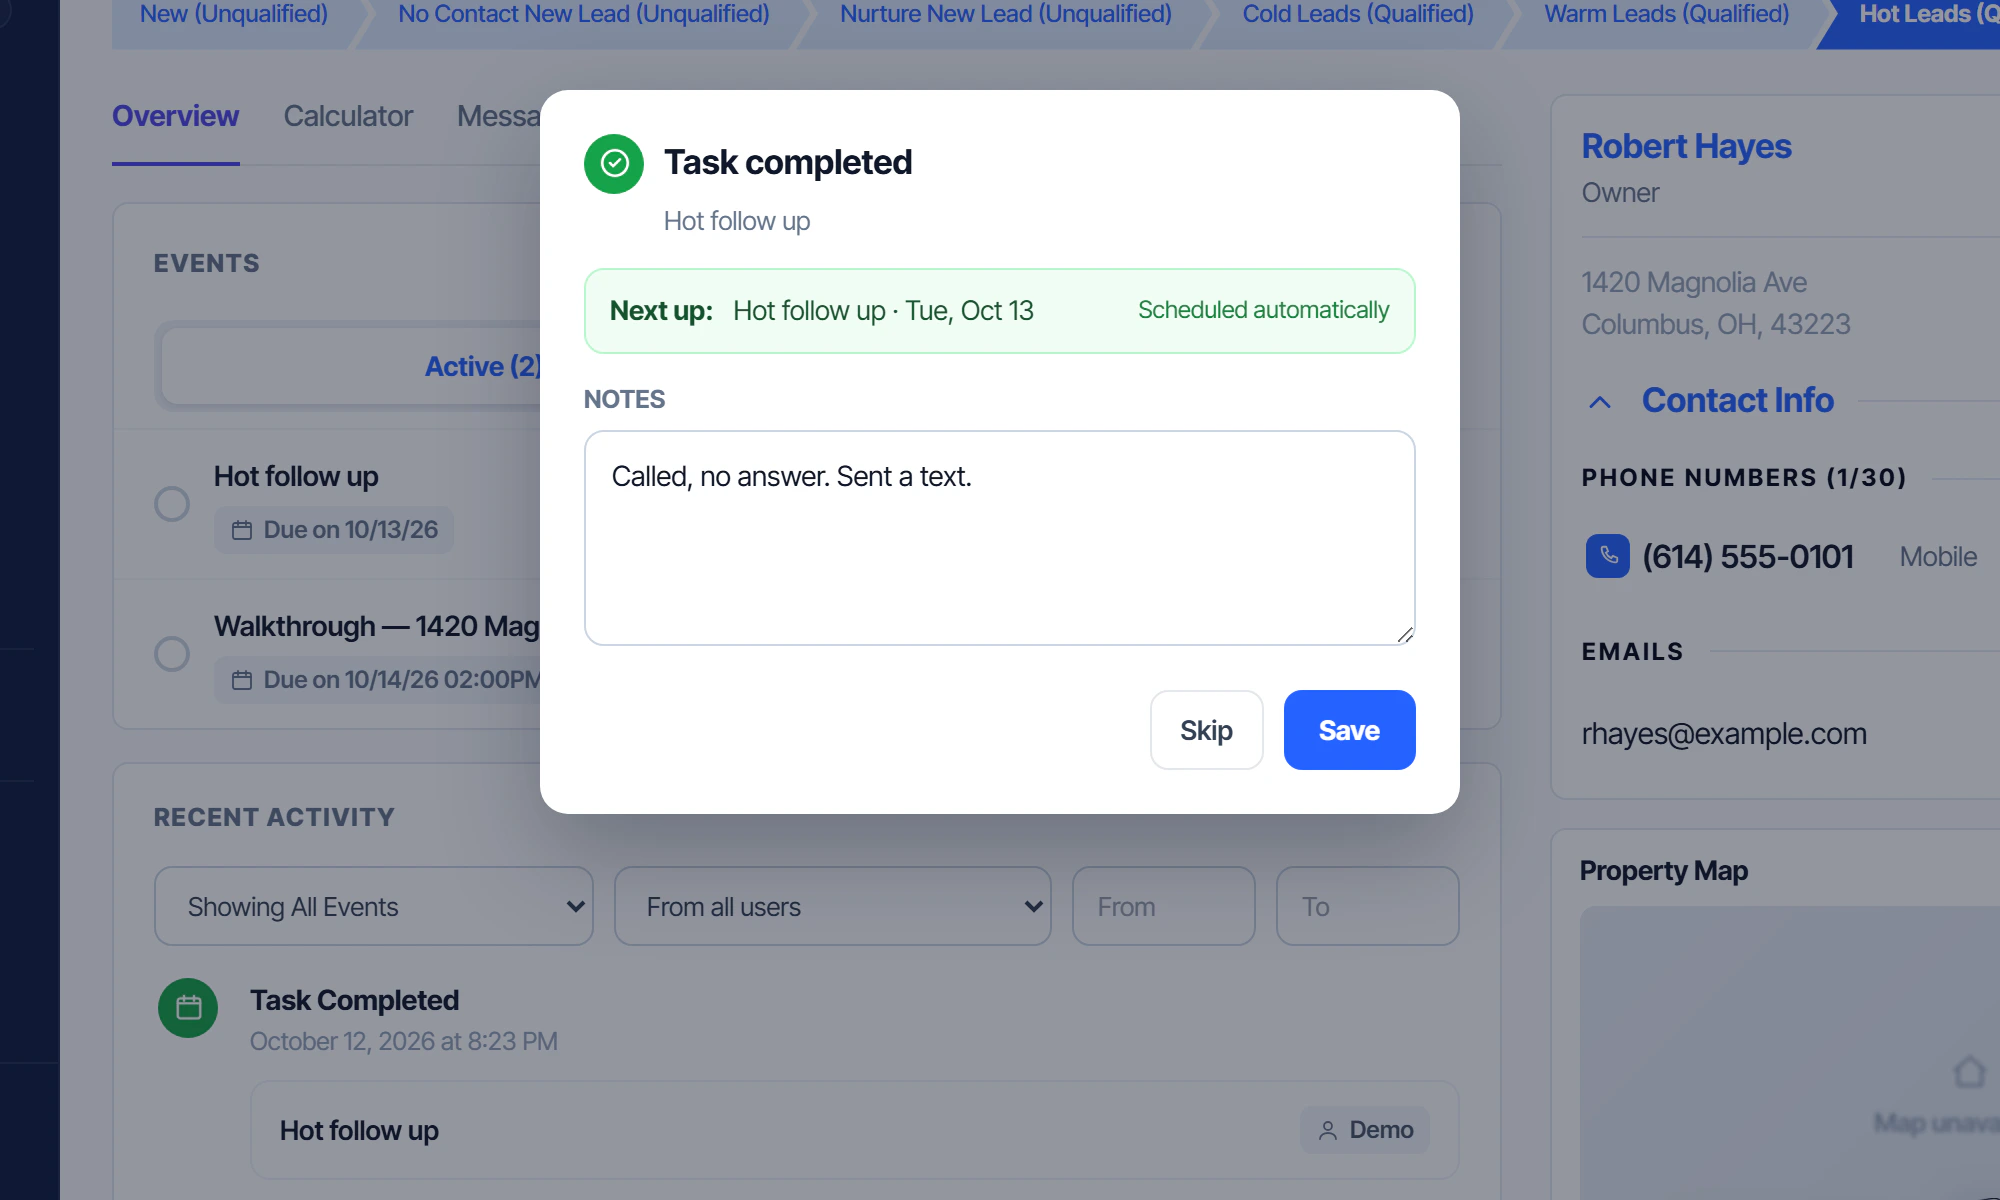
The sequence for a hot lead: call the seller; no answer, text them; then check off the to-do. DealFuse sets the next one for you.
- 1
This hot lead's follow-up is overdue. Make the call, then text if there's no answer.
- 2
Click the circle next to the to-do, write what happened and click Save.
- 3
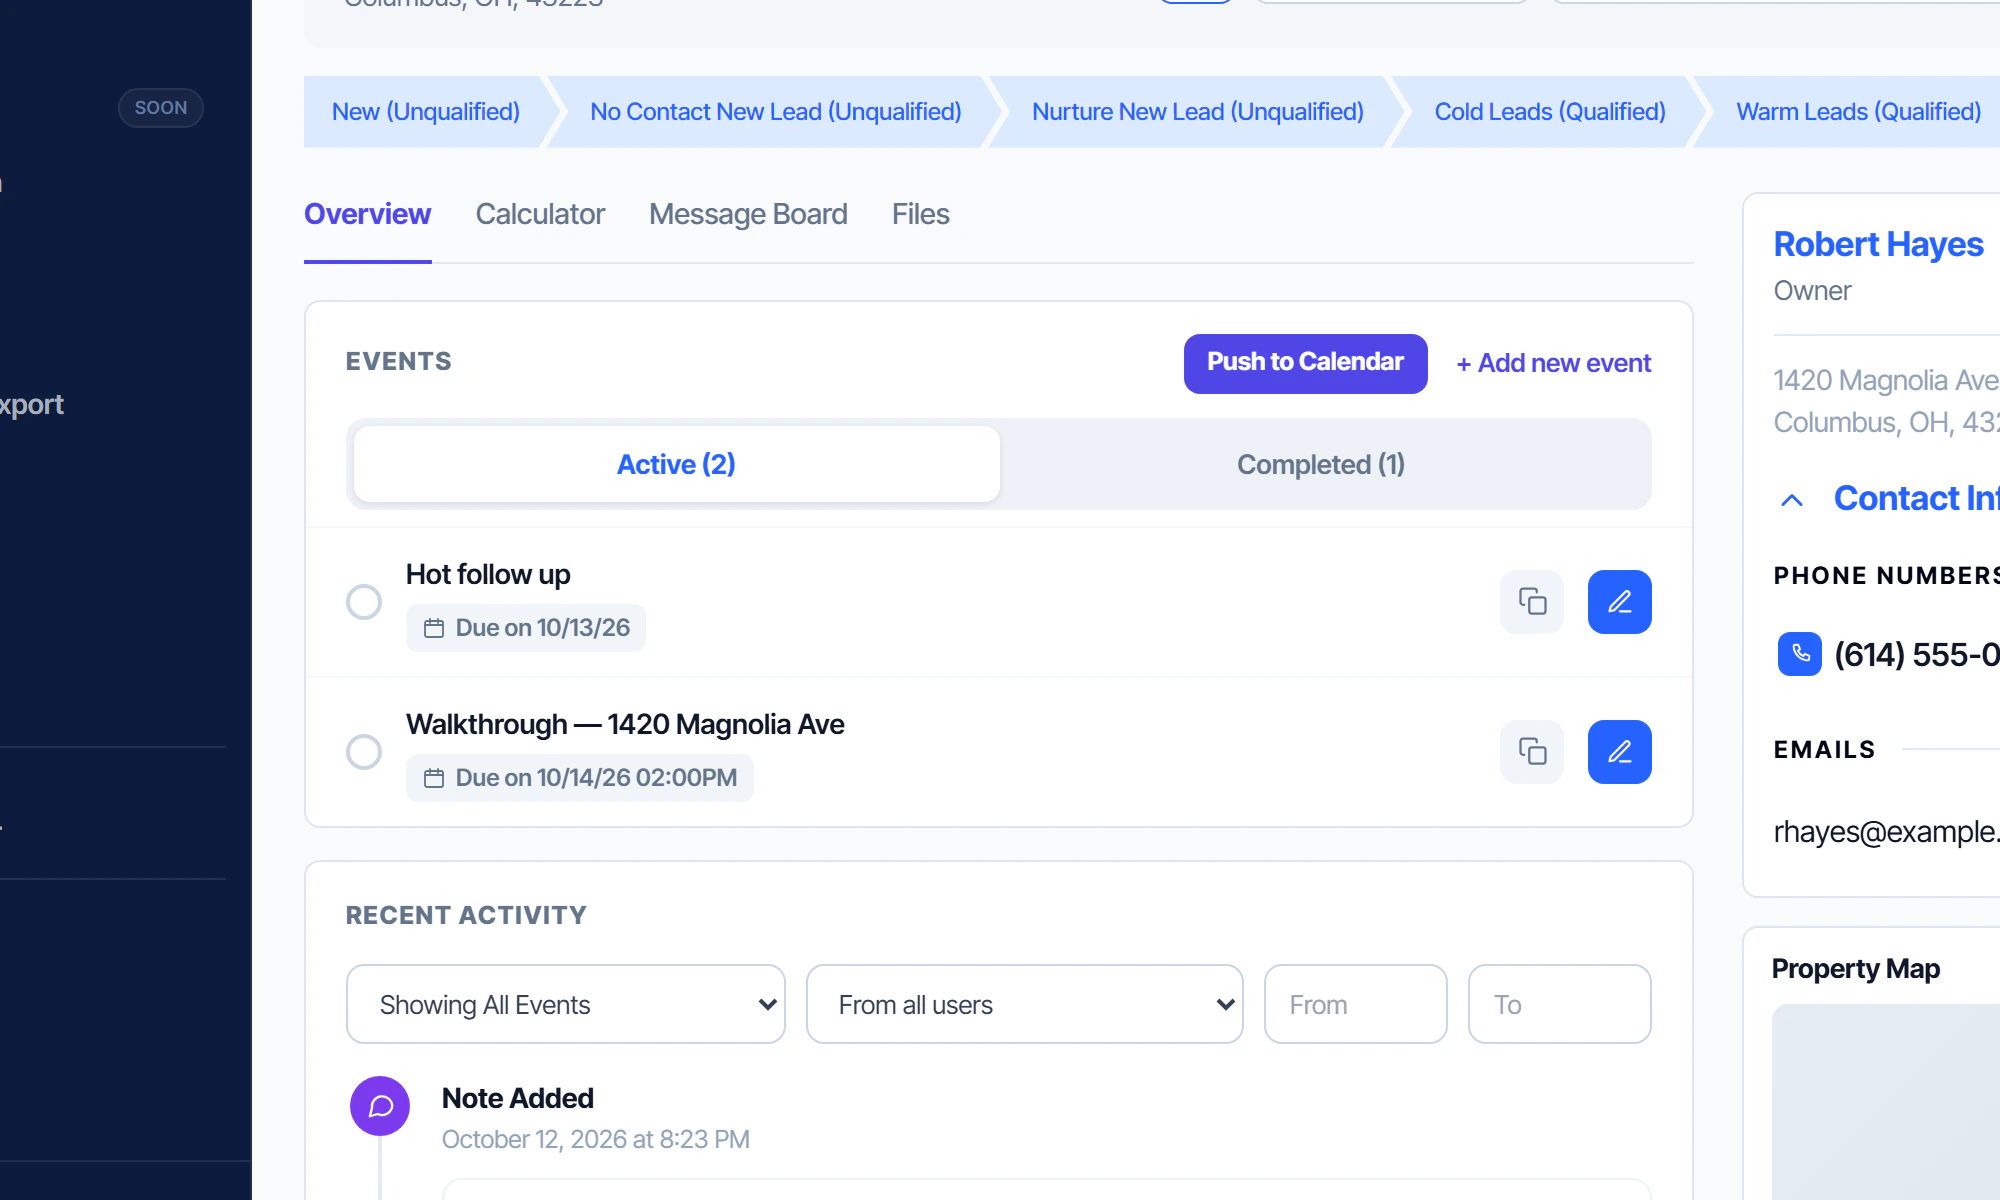
The next follow-up is already on the list.
Update the deal numbers
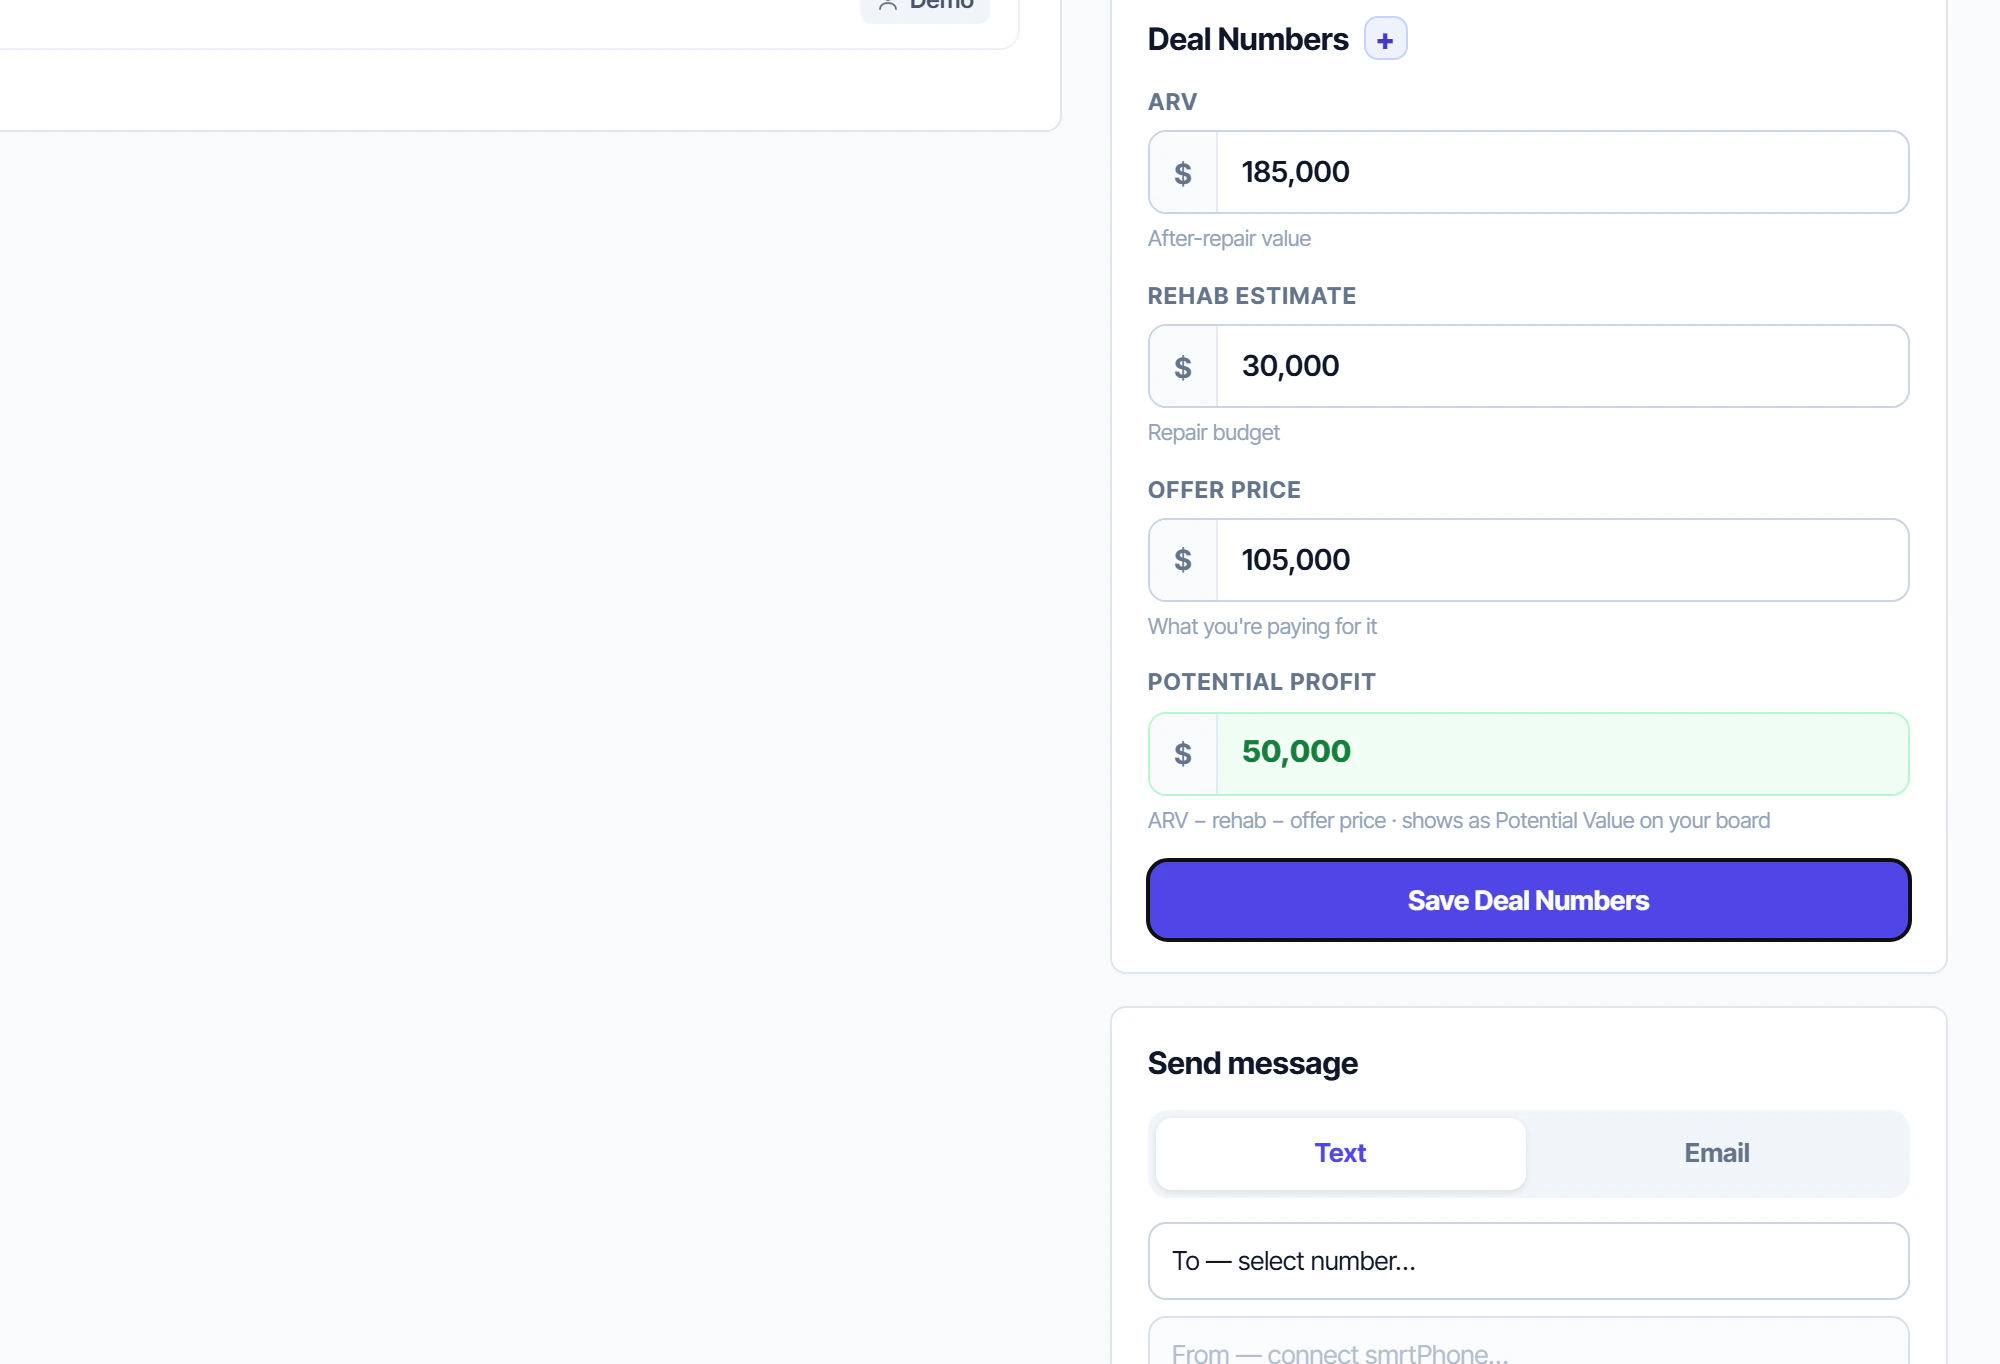
Put the numbers on the lead so you know how much you can offer the moment you open it.
- 1
Type the ARV, rehab estimate and offer price, then click Save Deal Numbers.
Change the category from Location in boards
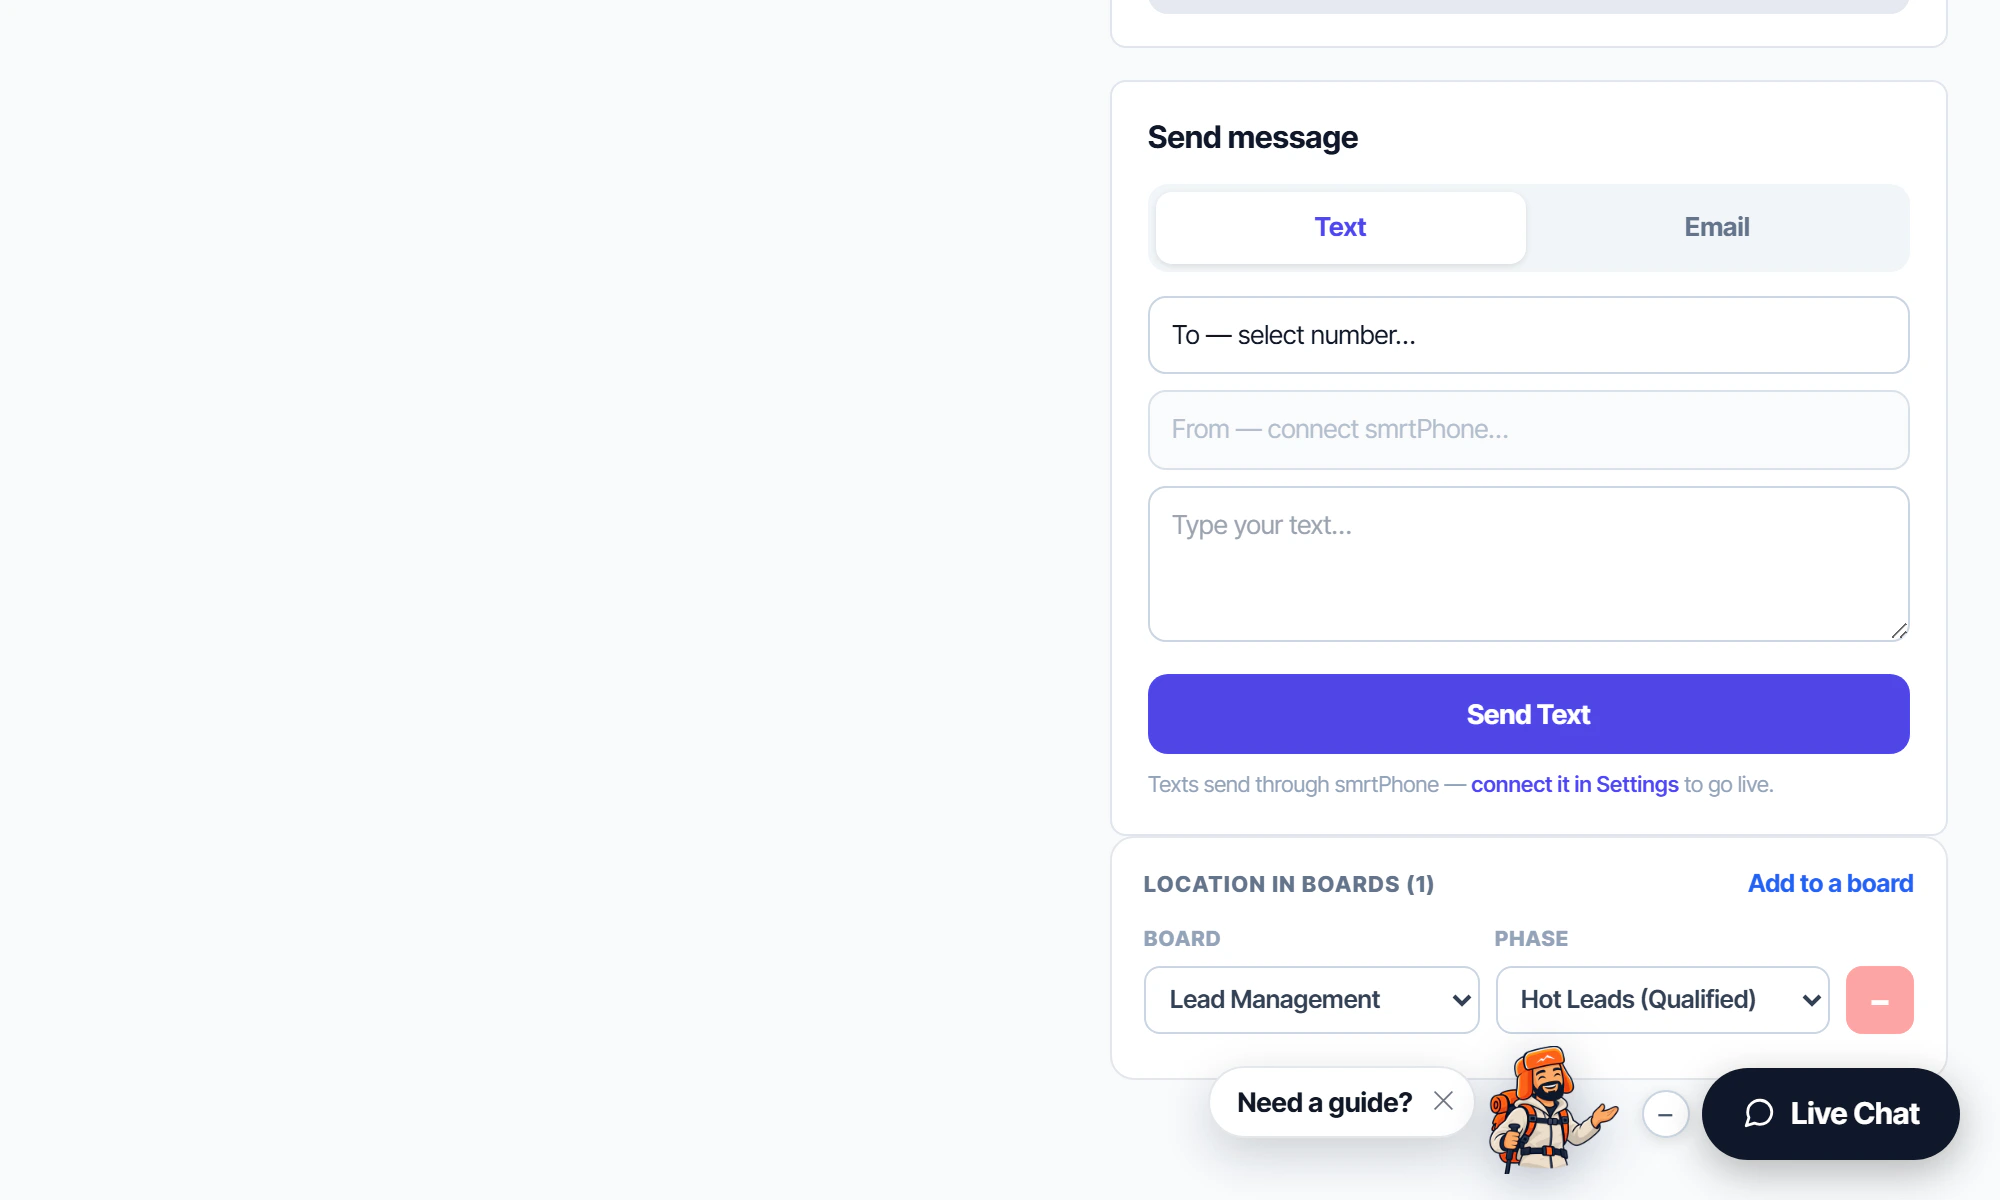
Location in boards, at the bottom of the lead, is a second place to move it. Here the lead goes from Hot to Warm, and its follow-up moves out to 14 days.
- 1
Change the category in Location in boards. Here, Hot to Warm.
- 2
The to-do is now a Warm follow up.
Work your to-dos from the pipeline
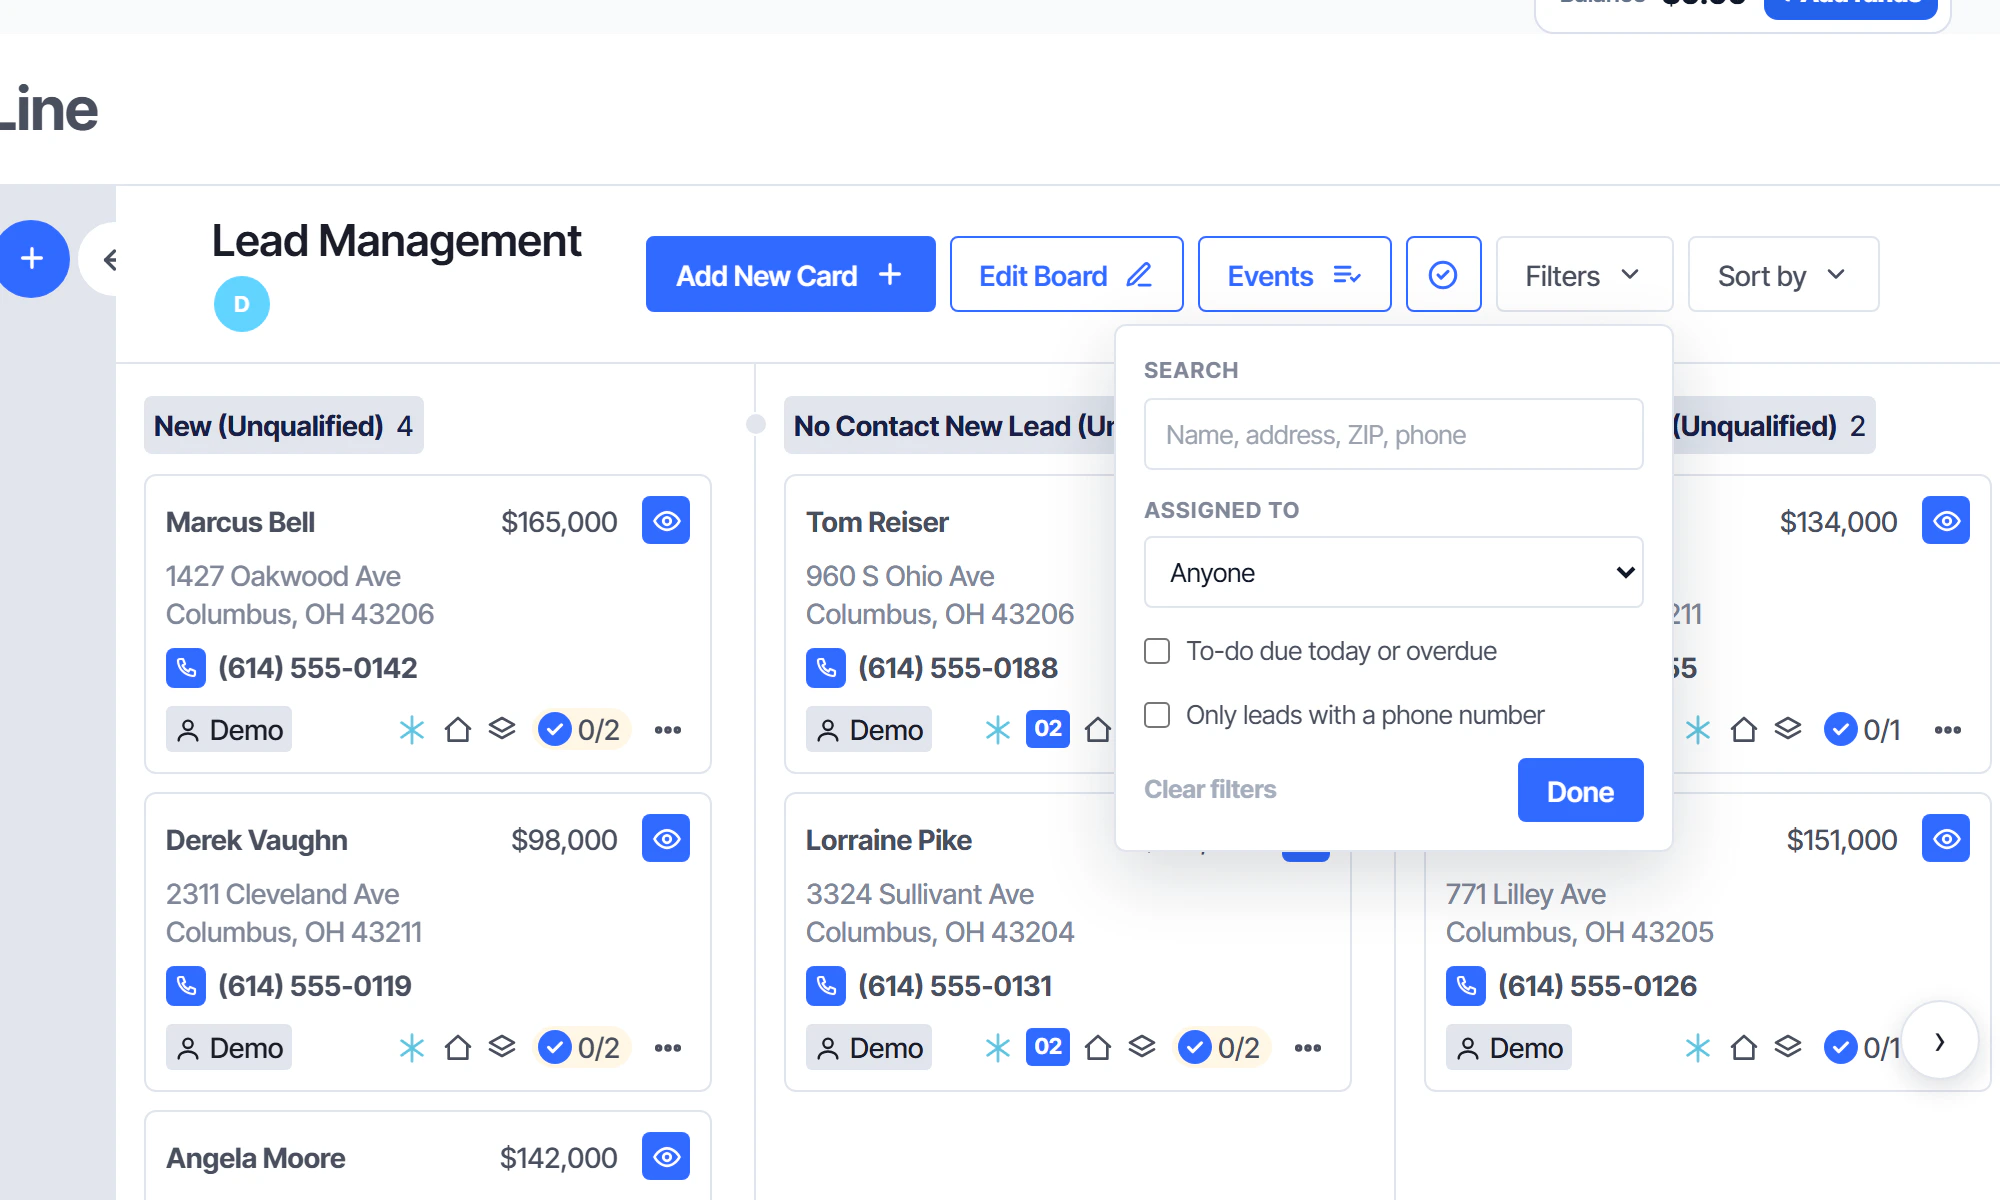
Prefer the board? The same daily list is one filter away on the CRM Pipeline.
- 1
Click Filters, choose yourself under Assigned to, and tick To-do due today or overdue.
Bring your leads over from another CRM
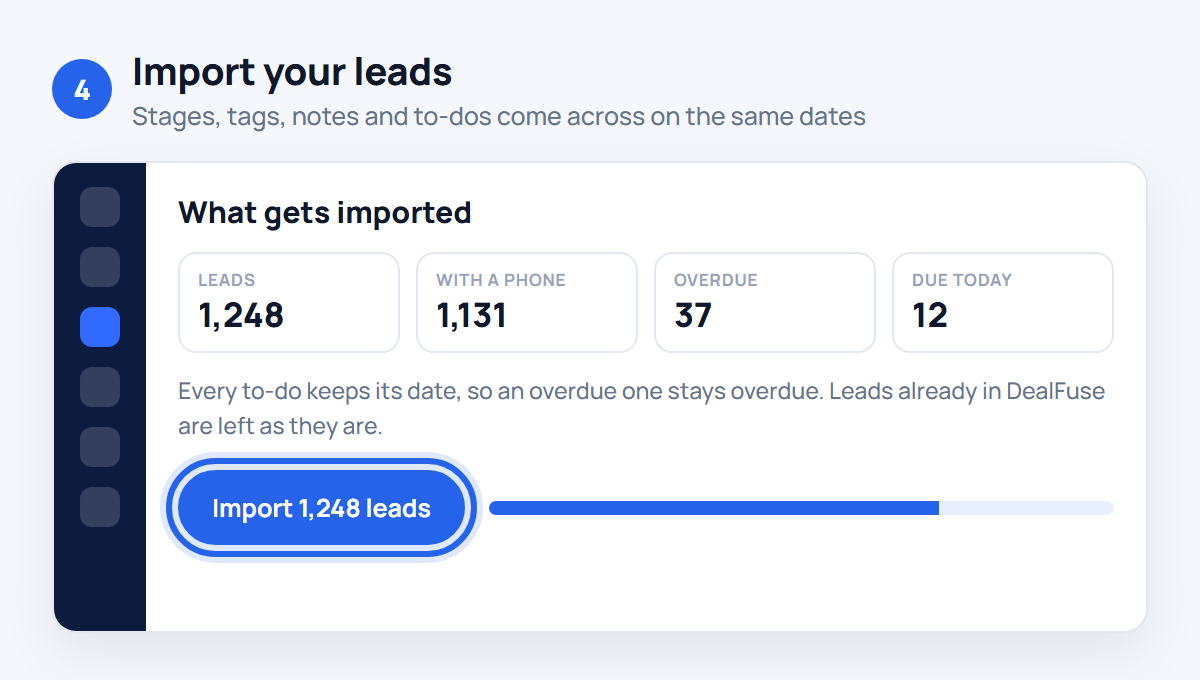
Moving from another CRM or a spreadsheet? Export your leads as a CSV (or start from our template on the import page) and bring them all across in one go. Each lead keeps its stage, tags, notes and next to-do, and every to-do keeps its date, so an overdue one stays overdue.
Leads already in your DealFuse are left as they are, so importing the same file twice won't make duplicates. Any column you don't match is saved word for word in a note on the lead, so nothing is lost.
- 1
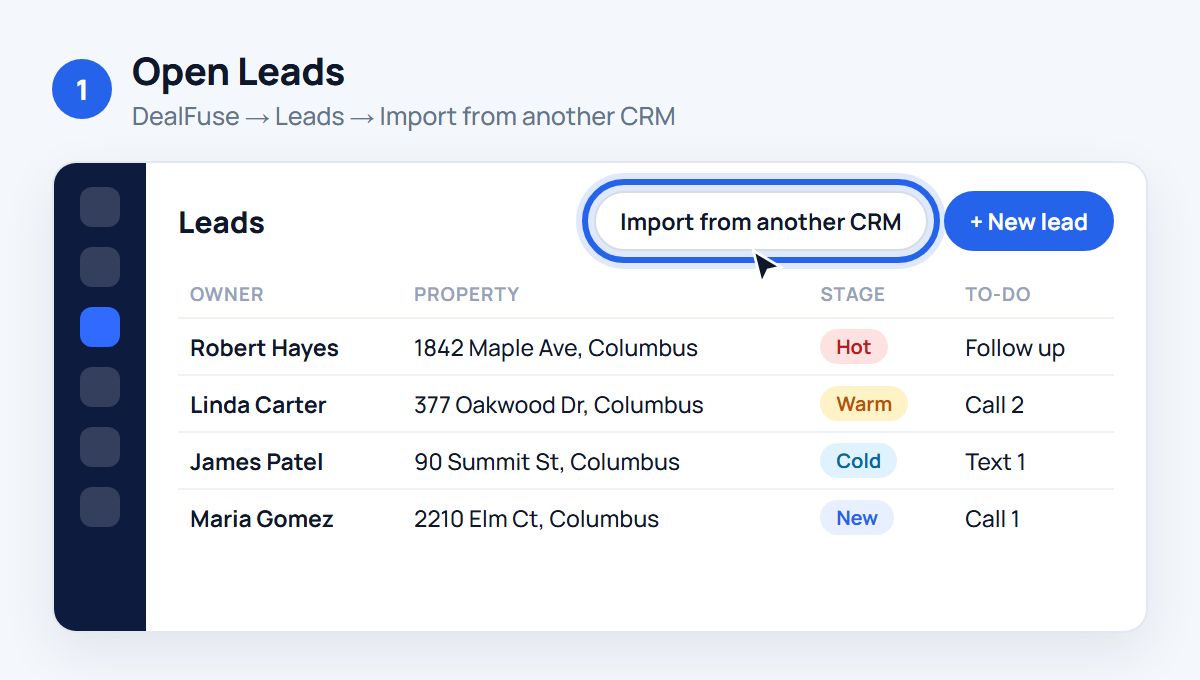
Open Leads in DealFuse and click Import from another CRM.
- 2
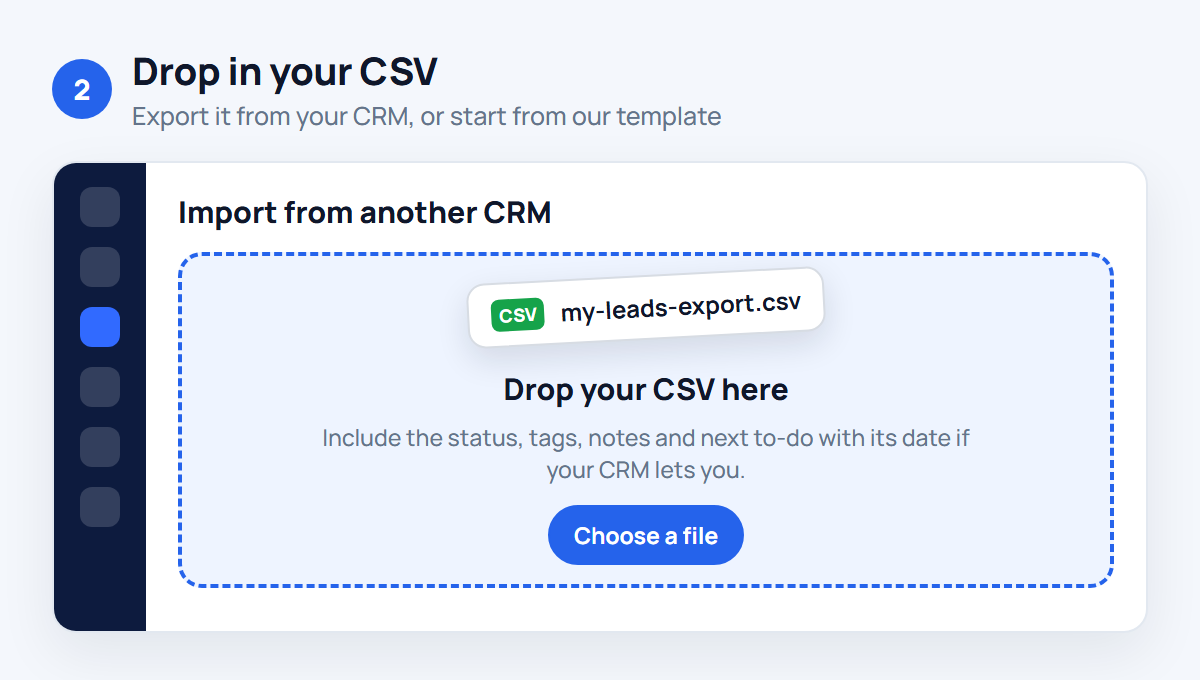
Drop in the CSV your old CRM exports, or click Choose a file. Include the status, tags, notes and next to-do with its date if your CRM lets you.
- 3
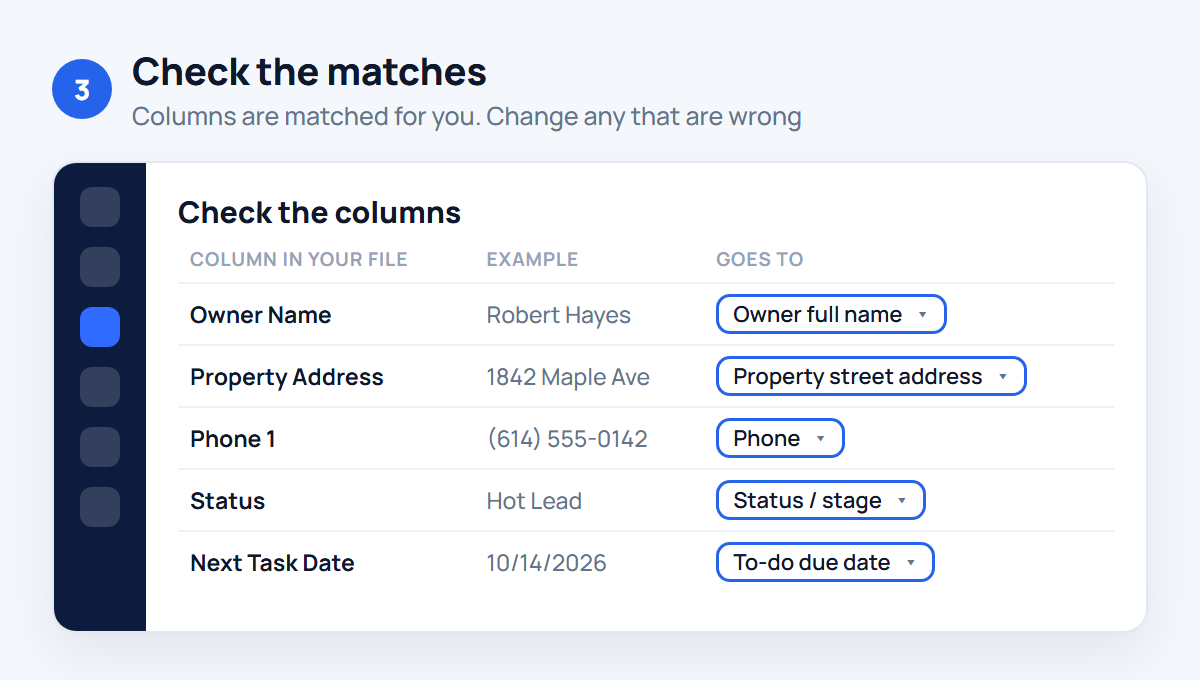
Each column is matched to a DealFuse field for you. Change any that are wrong, then match your old statuses to DealFuse stages.
- 4
Check the summary and click Import. When it finishes, Open my leads takes you straight to them.